1. Overview
PostgreSQL is one of the most popular free open-source relational database management systems in the world. Other than complies to SQL standard, PostgreSQL also provides a great extensibility which allows users to define their own extensions. With such a great feature, PostgreSQL is not only a database but also an application development platform. In this tutorial, we will go through the entire process about creating an extension, running test against this extension, and debugging the extneson using Eclipse.
2. Create an extension
To create an extension in PostgreSQL, you need at least two files: control file and SQL script file. The control file uses a naming convention extension_name.control. let‘s create an extension call get_sum, then the confile file should contain the basic information like below.
1 | $ cat get_sum.control |
commentcomments about this extensiondefault_versionthe version of this extension which is also part of the SQL script filemodule_pathnamespecifies the shared library path for this extension
The SQL script file must be named as extension_name--version.sql.
1 | $ cat get_sum--0.0.1.sql |
The second line is to avoid loading this SQL script using psql, and the rest declares the get_sum function will be created in shared library using c language.
Typically, an extension not only defines new objects, but also adds new logic to deal with those new objects. To boost the performance, you should write the logic in C code with a Makefile. PostgreSQL provides a build infrastructure for extension called PGXS, which uses a global variable USE_PGXS to include the global PGXS makefiles. One typical Makefile example found in PostgreSQL is something like below.
1 | MODULE_big = dblink |
With PGXS build infrastructure, you can build your extension by simply typing make If you put your extension under the contrib folder within PostgreSQL source tree, or you have to specify the PG_CONFIG to tell the make command where to find out the pg_config If you put your extension somewhere else.
In the latest PostgreSQL official document, the assumption that an extension should be under the PostgreSQL source tree has been removed. The reason is that there are more and more extension coming from the Internet, and it is not easy to manage so many extensions within PostgreSQL source tree. Let’s follow the latest instruction to build our Makefile.
1 | $ cat Makefile |
MODUELSspecifies the shared object can be used in psqlEXTENSIONspecifies the extension nameDATAspecifies the SQL scriptsREGRESSspecifies the regression test script file
The rest is following the latest recommendation from postgreSQL official website. In other words, we should always provide the PG_CONFIG when building or testing the extension.
Once the Makefile is set, you need to create a C file. In this tutorial, we build a simple get_sum function to explain how to add a C file into the extension.
1 | $ cat get_sum.c |
Here, the header file postgres.h includes most of the basic stuff needed for interfacing with Postgres. It should be included in every C-File when declares Postgres functions. The header file fmgr.h needs to be included in order to use PG_GETARG_XXX, PG_RETURN_XXX and PG_ARGISNULL macros. The details about the macros are defined here. This extension function is declared as get_sum with two integers as input parameters, and the result is the sum of these two input parameters.
3. Test an extension
In order to verify this extension, we need to follow PostgreSQL regression test framework to add some test cases. First, we need to create a folder named as sql, which contains the SQL test scripts need to be run.
1 | $ cat sql/get_sum_test.sql |
Then we need to create another folder called expected, as the name indicated, it holds the expected output corresponding to the test SQL script. To build the expected output, as recommended by postgresSQL: run the test once, a results folder will be generated with the test results named as script_name.out, check the result to see if it is what you expected, then simply copy this result file to expected folder. If you run the test again, the regress test framework will compare a new test results output against the file in expected folder, if any difference found, then a .diff file will be created. Now, let’s run a test.
1 | cd crontrib/get_sum/ |
Build and install the extension including shared library, contorl and SQL script files, then run installcheck to test the extension function using the SQL test scripts.
1 | make PGUSER=postgres PG_CONFIG=~/eclipse-workspace/postgres/bin/pg_config installcheck |
If the extension function works properly, then you should see the message like below,
1 | /home/david/eclipse-workspace/postgres/lib/pgxs/src/makefiles/../../src/test/regress/pg_regress --inputdir=./ --bindir='/home/david/eclipse-workspace/postgres/bin' --dbname=contrib_regression get_sum_test |
4. Debug an extension
This get_sum is a very simple example to show the basic when creating a new extension from scratch. In reality, the extension will be way complicated, and you might need to keep debugging the extension until it works as designed. If you follow my previous post, then we can use Eclipse to debug this extension.
First, turn on a Linux terminal and start the postgers services,
1 | $ pg_ctl -D $HOME/pg12data/data/ -l logfile start |
And then start a psql connection,
1 | $ psql -U postgres |
Now, create the extension for get_sum,
1 | postgres=# CREATE EXTENSION get_sum; |
Turn on another terminal, run ps -ef |grep postgres to find out the pid of the postgres which is dealing with requests coming from current psql connection.
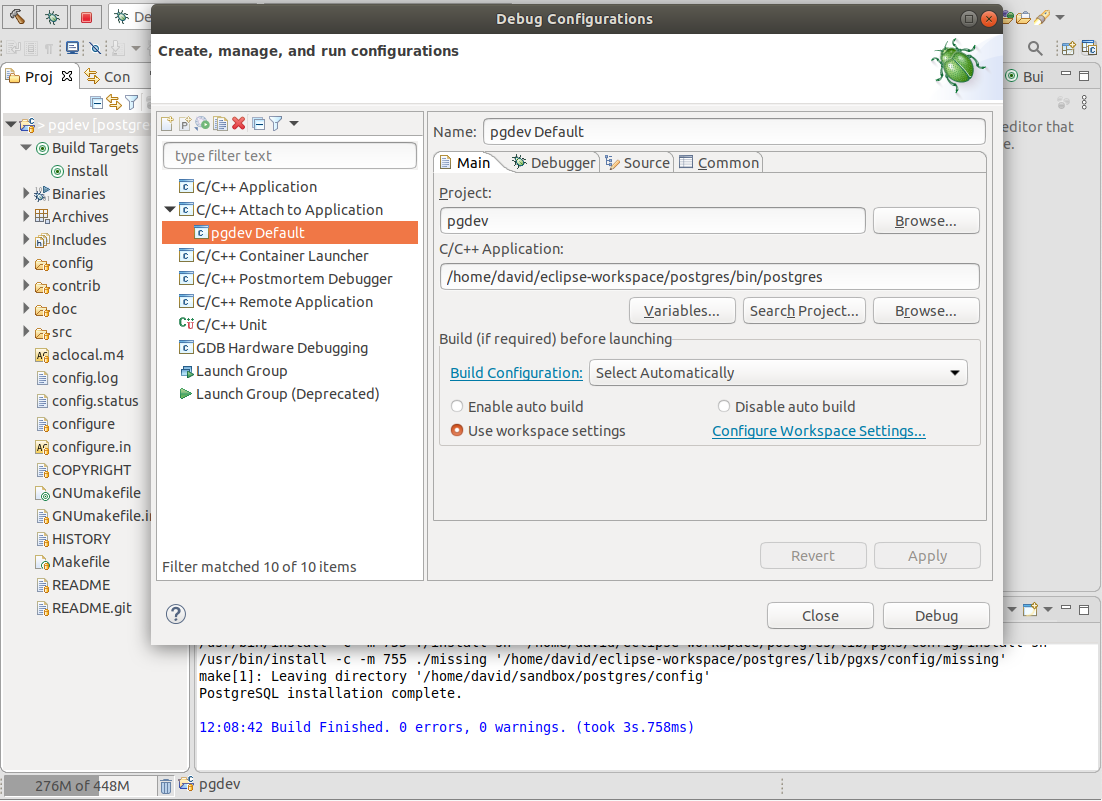
Switch back to the Eclipse, right click on project, select Debug As, then select Debug Configurations…. Fill in the information as shown below then click Debug.
A window will pop up like below for you to choose the right progres to attach.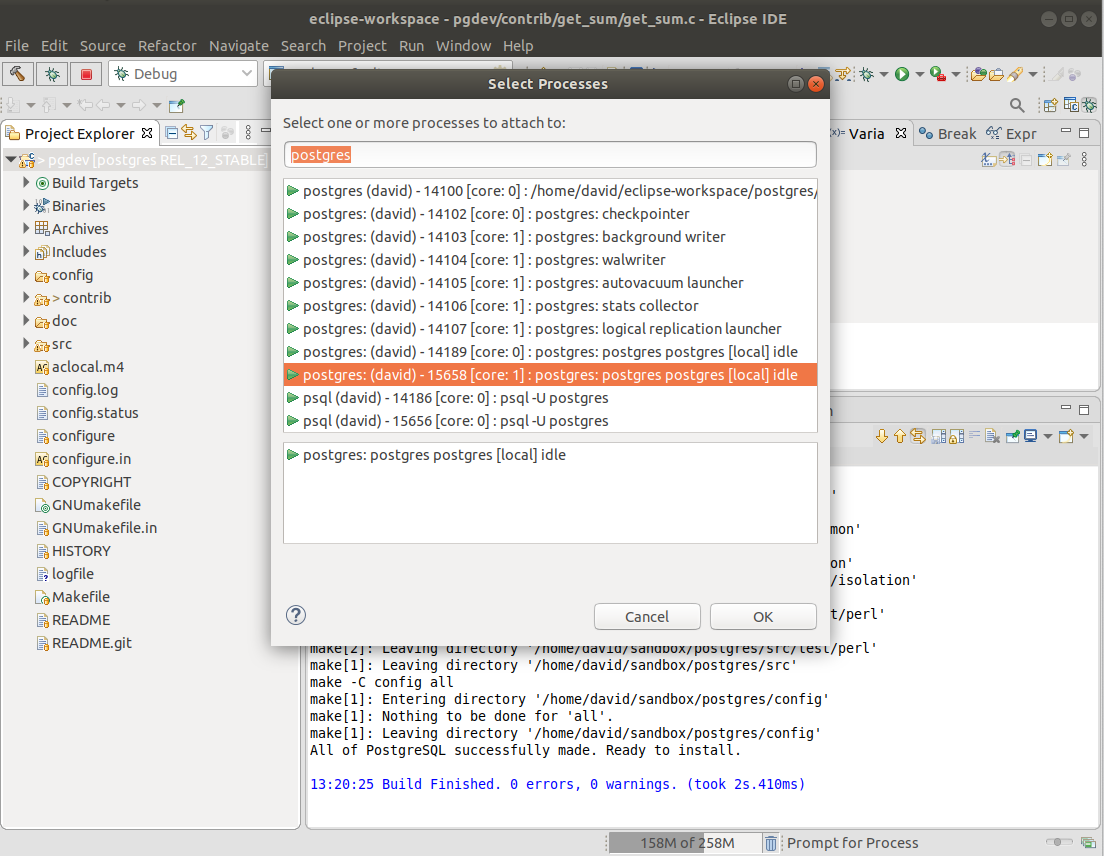
Switch to the psql terminal, then type a query to use this extension, for example,
1 | postgres=# select get_sum(111, 222); |
The terminal should be frozen immediately. Switch back to Eclipse, and you should see the postgres stopped inside get_sum c function. If you type bt from the Debugger Console, then the backtrace should show up like below and you can dig into it to see how the extension is eventually called.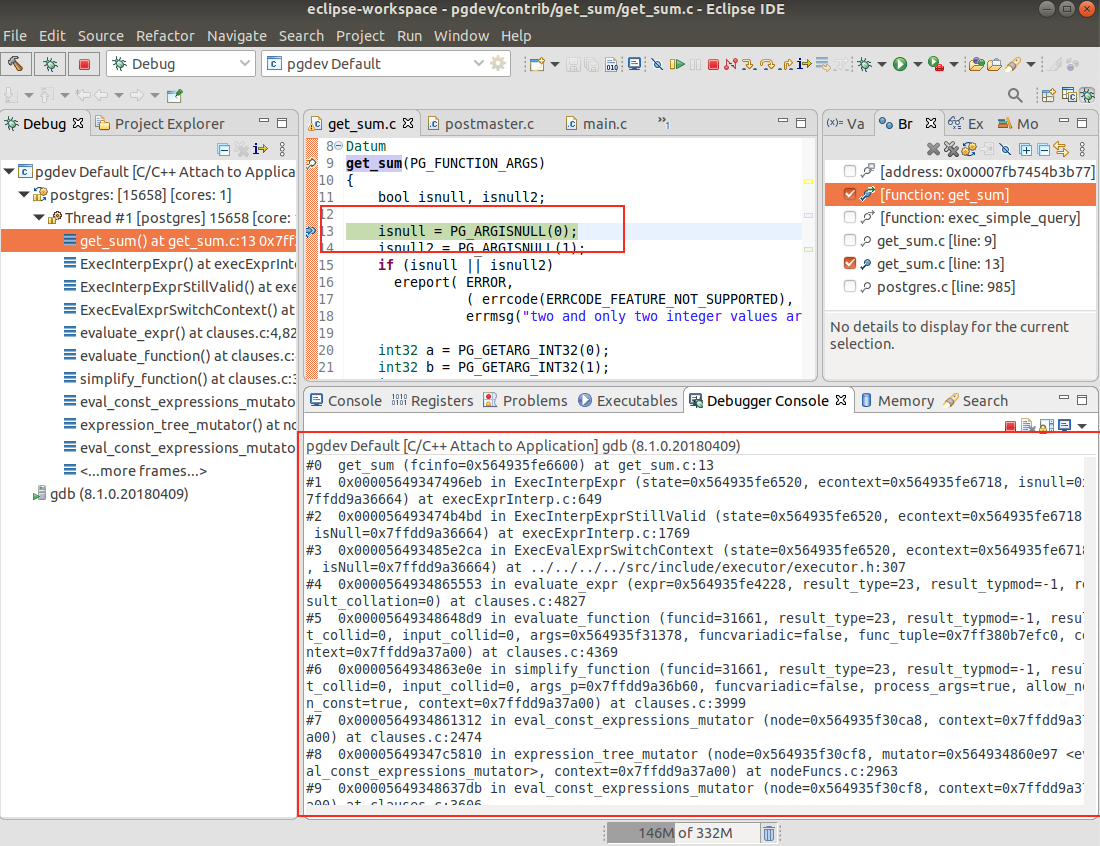
Now, you can try to print out the input variables and the result before and after, and compare with the psql console input and output. If anything goes wrong, you use Elipse to find out the issue and fix the extension code from there.
Below is the Eclipse debugging message,
This is the psql console screenshot,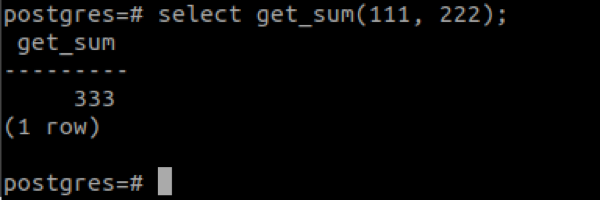
All the source code used in this tutorial is available here
5. Summary
In this blog, we discussed how to create an extension from scratch within PGXS build infrastrature, how to create some test cases to test the extension, and we also covered the procedure of debugging an extension using Eclipse.
Reference:
1. A Guide to Create User-Defined Extension Modules to Postgres
2. How to build and debug PostgreSQL 12 using latest Eclipse IDE on Ubuntu 18.04