Followed my previous blog, Global Index, a different approach, we posted our initial Global Unique Index POC to Postgres community for open discussion about this approach. Now, this blog is trying to explain how the benchmark was performed using pgbench on this initial Global Unique Index POC.
2. Build global index
Before running the performance benchmark tests, here is steps about how to build Global Unique Index from the initial POC.
./configure –prefix=/media/disk1/globalindex –enable-tap-tests –enable-debug “CFLAGS=-g3 -O0 -fno-omit-frame-pointer” “CC=gcc -std=gnu99” ./make clean && make && make install
3. Test with pgbench
Our Global Unique Index is designed to address the requirement to access a partitioned table using non-partition column with an unique index. In another words, users can build a cross-partition (globally) unique index without partition-key for select, insert, update and delete.
The goal is to test the performance using pgbench, however, only aid in pgbench_accounts is designed to be unique, and it is also used as partition-key. To test unique with pgbench, we prepare the data with below 5 steps,
1) initiate the data without partition; 2) recreate four pgbench tables after the original tables has renamed; 3) create partitions using bid as partition-key; 4) attach all partitions to pgbench_accounts table; 5) import the data from renamed tables correspondingly. Here is a simple script to achieve the above 5 steps, cat init-gi.sh
## 1,000,000 tuples per partition PART=$(( ${SCALE}/10 ))
## pgbench init pgbench -i -s $SCALE postgres
## backup tables and data psql -d postgres -c "alter table pgbench_accounts rename to pgbench_accounts_bak; alter table pgbench_branches rename to pgbench_branches_bak; alter table pgbench_history rename to pgbench_history_bak; alter table pgbench_tellers rename to pgbench_tellers_bak;"
## create partitions using bid as partition key so that aid can be used for global unique index test psql -d postgres -c "CREATE TABLE public.pgbench_accounts (aid integer NOT NULL, bid integer, abalance integer, filler character(84)) PARTITION BY RANGE (bid);" for ((i=0; i<$PART; i++)) do psql -d postgres -c "CREATE TABLE public.pgbench_accounts_$i (aid integer NOT NULL, bid integer, abalance integer, filler character(84));" psql -d postgres -c "ALTER TABLE ONLY public.pgbench_accounts ATTACH PARTITION public.pgbench_accounts_$i FOR VALUES FROM ($(( $i*10+1 ))) TO ($(( ($i+1)*10+1 )));" done
## add default partition psql -d postgres -c "CREATE TABLE public.pgbench_accounts_default(aid integer NOT NULL, bid integer, abalance integer, filler character(84));" psql -d postgres -c "ALTER TABLE ONLY public.pgbench_accounts ATTACH PARTITION public.pgbench_accounts_default FOR VALUES FROM ($(( $i*10+1 ))) TO (MAXVALUE);"
## recreate other tables psql -d postgres -c "CREATE TABLE public.pgbench_branches (bid integer NOT NULL, bbalance integer, filler character(88)); CREATE TABLE public.pgbench_history (tid integer, bid integer, aid integer, delta integer, mtime timestamp without time zone, filler character(22)); CREATE TABLE public.pgbench_tellers (tid integer NOT NULL, bid integer, tbalance integer, filler character(84));"
## import data from backup psql -d postgres -c "insert into pgbench_accounts select * from pgbench_accounts_bak; insert into pgbench_branches select * from pgbench_branches_bak; insert into pgbench_history select * from pgbench_history_bak; insert into pgbench_tellers select * from pgbench_tellers_bak;"
Where, the only input parameter SCALE is the scale for pgbench to initialize data. The internal variable PART is used to manage how many tuples per partition. As pgbench generates 100,000 records for one scale, so we use scale divided by 10 to load 1,000,000 records to each partition. It can always be changed to different values according to the benchmark requirement. Here, we simply set it to 10 and load 1 million records to each partition. Therefore, the number of partitions is equal to scale/10 + 1 (a default partition is added).
To compare the queries performance, we run the performance in below 3 scenarios,
1) query data without any index, randomly query a record from many partitions using a non-partition column without index pgbench -n -c8 -j8 -T60 postgres -b select-only
2) query data with regular unique index, randomly query a record from many partitions using a non-partition column with unique index (Postgres existing feature, to build such an unique index, the partition-key has to be involved).
1
2
psql -d postgres -c "create unique index local_idx_pgbench_accounts_aid on pgbench_accounts (bid, aid);"
pgbench -n -c8 -j8  -T60 postgres -b select-only
3) query data with global unique index, randomly query a record from many partitions using a non-partition column with global unique index which was built on this non-partition column.
1
2
psql -d postgres -c "create unique index global_idx_pgbench_accounts_aid on pgbench_accounts using btree(aid) global;"
pgbench -n -c8 -j8  -T60 postgres -b select-only
With the setup above, you can experience select-only, simple-update and tpcb-like using pgbench built-in script with different numbers of partitions. For example, to compare the performance among no index, regular index, and global index with 100 partitions for select-only and tpcb-like, we can run below commands,
# global unique index ./init-gi.sh 100 psql -d postgres -c "create unique index global_idx_pgbench_accounts_aid on pgbench_accounts using btree(aid) global;" pgbench -n -c8 -j8 -T5 postgres -b select-only | grep tps pgbench -n -c8 -j8 -T5 postgres -b tpcb-like | grep tps
4. Performance benchmark
Here is the performance benchmark charts after repeated the tests above for 1, 10, 100, and 1000 partitions.
As you can see, with this approach: keep storage separately but enforcement uniqueness check across all of a partitioned table’s indexes, the performance is related with the number of partitions. There are probably some parts we potentially can look into, such as 1) using cache to optimize the disk I/O usage; 2) find out a way to avoid unnecessary partitions check, etc.
5. Summary
In this blog, I explained how the performance benchmark was performed on the initial Global Unique Index POC for random select and update, and I hope it can help analyze the good or bad of this POC.
A few years ago, there was a proposal about adding the global index support to PostgreSQL for partitioned table. Following that proposal, there were many discussions and also an initial version POC to demonstrate the possibility, the technical challenges and the potential benefits, etc. However, the global index feature is still not available in PostgreSQL official release yet. This blog is trying to share a different approach and hopefully it is can to be implemented to benefit some users.
2. Basic global index requirement
There are many reasons to have this global index to be available on Postgres partitioned table, such as the performance enhancement for read-only queries across multiple partitions, the uniqueness of using non-partition key as index across multiple partitions, etc. For example, if users find out a table grow too fast and they have to split this table into partitions based on key1 while the applications are using key2 to retrieve data. In this case, with the global index available, they potentially can avoid the unnecessary changes to the applications.
3. Different approaches
To address this global index requirement, one POC in PostgreSQL community discussion was trying to store the global index in a single index relation. In this way, it definitely will have better performance as all the index tuples are stored in one index relation. However, one issue is that it will encounter the physical size limitation on one relation file. Another issue is that each detach needs to clean up this single global index relation and it is kind of violating one of the original partitioned table design ideas. As it was mentioned that one of the partitioned table design ideas is to cheaply add and remove partitions.
Another approach is that we can consider to keep the global index relation stored separately based on partition key and add the logic to allow globally access the separated global index relation with uniqueness restriction on a non-partitioned key. In this approach, we keep the benefits of the original partitioned table design. One is the size limitation of one relation as we have global index relation stored separately, the other one is that it is easy to maintain the detach performance. For attaching partition, it will depend on whether it is an empty table or table with data or even index.
The main idea of this approach is to use the existing feature by removing the restriction of must having partition key involved, and adds logic to handle the global uniqueness check on non-partition key and crossing partitions sort during index build.
4. Some initial tests
Based on the second approach with some basic changes, here are some simple test results to share.
4.1. Setup partitions
First, using pgbench to create 12 partitions and load data with scale 1000.
Second, create the global index without partition key (aid) restriction, but with global uniqueness check on non-partition key (bid).
1
postgres=# create unique index gidx on pgbench_accounts using btree(bid) global;
Here is how the schema looks like after a global index has been created.
1 2 3 4 5 6 7 8 9 10 11 12 13 14 15 16 17 18
postgres=# \d+ pgbench_accounts Partitioned table "public.pgbench_accounts" Column | Type | Collation | Nullable | Default | Storage | Compression | Stats target | Description ----------+---------------+-----------+----------+---------+----------+-------------+--------------+------------- aid | integer | | not null | | plain | | | bid | integer | | | | plain | | | abalance | integer | | | | plain | | | filler | character(84) | | | | extended | | | Partition key: RANGE (aid) Indexes: "pgbench_accounts_pkey" PRIMARY KEY, btree (aid) "gidx" UNIQUE, btree (bid) Partitions: pgbench_accounts_1 FOR VALUES FROM (MINVALUE) TO (8333335), pgbench_accounts_10 FOR VALUES FROM (75000007) TO (83333341), pgbench_accounts_11 FOR VALUES FROM (83333341) TO (91666675), pgbench_accounts_12 FOR VALUES FROM (91666675) TO (MAXVALUE), pgbench_accounts_2 FOR VALUES FROM (8333335) TO (16666669), ...
To distinguish the global index relation from normal index relation, here we use g to replace i.
1 2 3 4 5 6 7 8
postgres=# select oid, relname, relnamespace, reltype, reloftype, relam, relfilenode, relpages, reltuples, relhasindex, relkind from pg_class where relnamespace=2200 order by oid; oid | relname | relnamespace | reltype | reloftype | relam | relfilenode | relpages | reltuples | relhasindex | relkind -------+-----------------------------+--------------+---------+-----------+-------+-------------+----------+-----------+-------------+--------- 16690 | gidx | 2200 | 0 | 0 | 403 | 0 | 0 | 0 | f | I 16691 | pgbench_accounts_1_bid_idx | 2200 | 0 | 0 | 403 | 16691 | 22852 | 8.333334e+06 | f | g 16692 | pgbench_accounts_2_bid_idx | 2200 | 0 | 0 | 403 | 16692 | 22852 | 8.333334e+06 | f | g 16693 | pgbench_accounts_3_bid_idx | 2200 | 0 | 0 | 403 | 16693 | 22852 | 8.333334e+06 | f | g ...
4.3. Query with global index
Now, let’s run a simple query using non-partition key (bid) to compare the performance
1
2
3
4
5
6
7
8
9
10
11
12
13
14
15
16
17
18
postgres=# select * from pgbench_accounts where bid=75000007; aid | bid | abalance | filler ----------+----------+----------+-------------------------------------------------------------------------------------- 75000007 | 75000007 | 0 | (1 row)
Time: 2.243 ms
postgres=# explain select * from pgbench_accounts where bid=75000007; QUERY PLAN -------------------------------------------------------------------------------------------------------------- Append (cost=0.43..101.46 rows=12 width=97) -> Index Scan using pgbench_accounts_1_bid_idx on pgbench_accounts_1 (cost=0.43..8.45 rows=1 width=97) Index Cond: (bid = 75000007) -> Index Scan using pgbench_accounts_2_bid_idx on pgbench_accounts_2 (cost=0.43..8.45 rows=1 width=97) Index Cond: (bid = 75000007) ...
As the explain shows above, the index scan has been used.
4.4. Query without index
Then, let’s drop the global index, and run the same query again,
postgres=# create unique index lidx on pgbench_accounts using btree(aid, bid);
postgres=# create unique index lidx on pgbench_accounts using btree(aid, bid); CREATE INDEX
postgres=# select * from pgbench_accounts where bid=75000007; aid | bid | abalance | filler ----------+----------+----------+-------------------------------------------------------------------------------------- 75000007 | 75000007 | 0 | (1 row)
Time: 3312.177 ms (00:03.312)
postgres=# explain select * from pgbench_accounts where bid=75000007; QUERY PLAN ----------------------------------------------------------------------------------------------------------------------- Append (cost=0.43..1846949.37 rows=12 width=97) -> Index Scan using pgbench_accounts_1_aid_bid_idx on pgbench_accounts_1 (cost=0.43..153912.45 rows=1 width=97) Index Cond: (bid = 75000007) -> Index Scan using pgbench_accounts_2_aid_bid_idx on pgbench_accounts_2 (cost=0.43..153912.45 rows=1 width=97) Index Cond: (bid = 75000007)
With the same query, we still can see a big difference between global index and original index with partition key restriction (2.243 ms vs. 3312.177 ms).
4.6. Uniqueness on non-partition key
Below examples are trying to demonstrate that without the uniqueness check on non-partition key offered by global index, a duplicated bid record insertion can’t not be blocked.
postgres=# select * from pgbench_accounts where bid=75000007; aid | bid | abalance | filler -----------+----------+----------+-------------------------------------------------------------------------------------- 75000007 | 75000007 | 0 | 100000001 | 75000007 | 0 | (2 rows)
However, with the uniqueness check on non-partition key offered by global index, the insertion of a duplicated bid record can be detected and blocked out. postgres=# insert into pgbench_accounts values(100000001, 75000007, 0, ‘’); ERROR: duplicate key value violates unique constraint “pgbench_accounts_10_bid_idx” DETAIL: Key (bid)=(75000007) already exists.
5. Summary
In this blog, I explained a different approach to achieve logical global index features but keep the physical storage separately, which can potential keep the original partitioned table design idea on PostgreSQL, and demonstrated the benefit of query performance and the uniqueness check on non-partition key.
Similar to PostgreSQL, Lustre file system is also an open source project which started about 20 years ago. According to Wikipedia, Lustre file system is a type of parallel distributed file system, and is designed for large-scale cluster computing with native Remote Direct Memory Access (RDMA) support. Lustre file systems are scalable and can be part of multiple computer clusters with tens of thousands of client nodes, tens of petabytes (PB) of storage on hundreds of servers, and more than a terabyte per second (TB/s) of aggregate I/O throughput. This blog will explain how to setup a simple Lustre file system on CentOS 7 and run PostgreSQL on it.
2. Lustre file system
To deliver parallel file access and improve I/O performance, Lustre file system separates out metadata services and data services. From high level architecture point of view, Lustre file system contains below basic components: Management Server (MGS), provides configuration information about how the file system is configured, notifies clients about changes in the file system configuration and plays a role in the Lustre recovery process. Metadata Server (MDS), manages the file system namespace and provides metadata services to clients such as filename lookup, directory information, file layouts, and access permissions. Metadata Target (MDT), stores metadata information, and holds the root information of the file system. Object Storage Server (OSS), stores file data objects and makes the file contents available to Lustre clients. Object Storage Target (OST), stores the contents of user files. Lustre Client, mounts the Lustre file system and makes the contents of the namespace visible to the users. Lustre Networking (LNet) - a network protocol used for communication between Lustre clients and servers with native RDMA supported. If you want to know more details inside Lustre, you can refer to Understanding Lustre Internals.
3. Setup Lustre on CentOS 7
To setup a simple Lustre file system for PostgreSQL, we need to have 4 machines: MGS-MDS-MDT server, OSS-OST server, Lustre client1 and client2 (Postgres Servers). In this blog, I used three CentOS 7 virtual machines with below network settings:
To avoid dealing with Firewall and SELinux policy issues, I simply disabled them like below, Set SELINUX=disabled in /etc/selinux/config, and run commands,
Then update yum and install the filesystem utilities e2fsprogs to deal with ext4
1
yum update && yum upgrade -y e2fsprogs
If there is no errors, then install Lustre server and tools with yum install -y lustre-tests
3.2. Setup lnet network
Depends on your network interfaces setup, add the lnet configuration correspondingly. For example, all my 3 CentOS 7 has a network interface enp0s8, therefore, I added the configuration options lnet networks="tcp0(enp0s8)" to /etc/modprobe.d/lnet.conf as my Lustre lnet network configuration.
Then we need to load the lnet driver to the kernel, and start the lnet network by running below commands,
You can check if the lnet network is running on your Ethernet interface using command lctl list_nids, and you should see something like below,
1
10.10.1.1@tcp
You can try to ping other Lustre servers over the lnet network by running command lctl ping 10.10.1.2@tcp1. If the lnet network is working, then you should see below output,
1 2
12345-0@lo 12345-10.10.1.2@tcp
3.3. Setup MGS/MDS/MDT and OSS/OST servers
To set up the storage for MGS/MDS/MDT server, I added one dedicated virtual disk (/dev/sdb), created one partition (/dev/sdb1) and formatted it to ext4.
1 2 3
fdisk /dev/sdb ... mkfs -t ext4 /dev/sdb1
You need to repeat the same process on OSS/OST server to add actual files storage disk.
If everything goes fine, then it is time to mount the disk on Lustre servers. First, we need to mount the disk on MGS/MDS/MDT server by running below command,
After the Luster server’s setup is done, we can simply mount the lustre file system on client by running below commands,
1 2
mkdir /mnt/lustre mount -t lustre 10.10.1.1@tcp0:/lustrefs /mnt/lustre
If no error, then you can verify it by creating a text file and entering some information from one client, and check it from another client.
3.5. Setup Postgres on Lustre file system
As there are some many tutorials about how to setup Postgres on CentOS, I will skip this part. Assume you have installed Postgres either from an “official release” or compiled from the source code yourself, then run below tests from client1,
1 2 3 4 5 6 7 8 9
initdb -D /mnt/lustre/pgdata pg_ctl -D /mnt/lustre/pgdata -l /tmp/logfile start create table test(a int, b text); insert into test values(generate_series(1, 1000), 'helloworld'); select count(*) from test; pg_ctl -D /mnt/lustre/pgdata -l /tmp/logfile stop ```
From the above simple tests, you can confirm that the table created and records inserted by client1 are stored on remote Lustre file system, and if Postgres server stop on client1, then you can start Postgres server on client2 and query all the records inserted by client1.
#### 4. Summary
In this blog, I explained how to set up a parallel distributed file system - Lustre on a local environment, and verify it with PostgreSQL servers. I hope this blog can help you if you want to evaluate some distributed file systems.
PostgreSQL is a great open source project for many reasons. One of the reasons I like it is because of the design of buffer blocks addressing. In this blog, I am going to explain a possible way to share a Primary’s buffer blocks with a Standby. If you want to know more about how buffer tag works, you can refer to my previous blog.
2. Primary and Standby
In Postgres, a Primary is an active database which accepts connections and performs read-write SQL operations; a Standby is a copy of the active database, and it also accepts connection but only for read-only SQL operations. Because the Standby needs to perform the ‘copy’ action in order to synchronize with Primary database, technically they are not exactly equal if a SQL query is time sensitive. Then, the question is can we let a Standby to be equal to a Primary?
The answer is probably!. I recently did some experimental tests to see if a Standby can access Primary’s buffer blocks in order to check the data which has not been replicated yet. The results is very positive.
3. How to share it
To achieve this experimental remote buffer blocks access, here are a few things I did: On Primary side,
start a simple dedicated TCP/IP server to listen for the buffer tag request from Standby
check if the buffer block in memory for received buffer tag
If found and dirty then sends the 8KB buffer block to Standby
If not found then simply answer not found
On Standby side,
add a simple TCP/IP client for buffer manager
send buffer tag request to Primary when buffer manager needs to load a data block from disk
add 8KB data block to shared buffer if received from Primary
load data block from disk if buffer block not found on Primary
skip buffer tag check to avoid use cashed data blocks
With these basic changes, a Standby can access Primary’s buffer blocks and get the same query results even the data has not been replicated yet (in my experimental test, I actually also skip the head redo on Standby and let Standby to access Primary’s base cluster, disable the storage write actives).
4. Summary
In this blog, I introduced a way to experiment the access of Primary’s buffer blocks, and hope this can be a topic for further study if someone want to learn PostgreSQL in deep.
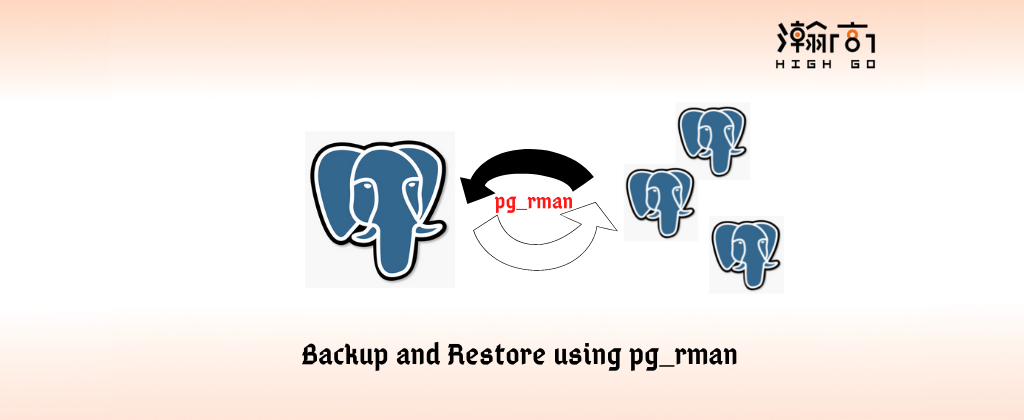
PostgreSQL is a very popular open-source relational database management system, and it is widely used in many different production environments. To maintain the production environment always functioning, you need to a lot tools, and one of the tools must to have been backup and restore. This blog is going to introduce one backup and restore tools designed for Postgres, i.e. pg_rman.
2. What is pg_rman
pg_ramn is a free utility program designed to backup and restore PostgreSQL database. It takes a physical online backup of whole database cluster, archive WALs, and server logs, and restore a specific backup when the Postgres is offline. pg_rman not only supports backup a Primary Postgres server, but also can get backup from a standby server. If you want to learn more about pg_rman, you can [check it out at] (https://github.com/ossc-db/pg_rman.git).
3.1. How to setup
Depends on the Postgres version you are running, in this blog, we will use the latest pg_rman tagged with V1.3.14 to demonstrate the backup and restore on PostgreSQL 14.
Now, assume you have the PostgreSQL 14 installed properly, then you can follow below steps to set up the Postgres server.
Once the backup folder has been initialized, then we can try to create a few tables and insert some data like below.
1 2 3 4 5 6
psql -d postgres -c "CREATE TABLE abc (ID INT);" psql -d postgres -c "CREATE TABLE xyz (ID INT);" psql -d postgres -c "INSERT INTO abc VALUES (1);" psql -d postgres -c "INSERT INTO xyz VALUES (1);" psql -d postgres -c "SELECT count(*) from abc;" psql -d postgres -c "SELECT count(*) from xyz;"
Now, we can run our first backup with below commands,
1 2
#Do a backup pg_rman backup --backup-mode=full --with-serverlog -B /media/david/disk1/backup_rman -D /media/david/disk1/pgdata_rman -A /media/david/disk1/archive -S /media/david/disk1/pglog -p 5432 -d postgres
here, we do a full backup to include everything, and with all the basic information for this full backup. pg_rman will ask you to valid the backup after each backup is done. So, to verify the backup we can simple run the command,
#### Insert more data psql -d postgres -c "INSERT INTO abc VALUES (3);" psql -d postgres -c "INSERT INTO xyz VALUES (3);"
$ pg_rman show -B /media/david/disk1/backup_rman ===================================================================== StartTime EndTime Mode Size TLI Status ===================================================================== 2022-05-27 13:05:30 2022-05-27 13:05:32 FULL 51MB 1 OK 2022-05-27 13:05:28 2022-05-27 13:05:30 FULL 51MB 1 OK
Now, we have two full backups first one has one record in each table, the second one has two records in each table, and the second backup we have inserted the third record to each table. If you query these two tables now, you can see below results.
As you can see we back to the second backup stage, and each table has only two records.
3.3. Anything is missing
The pg_rman is a great free open-source tool for PostgreSQL users to backup and restore the database, however, there is one feature missed at this moment, i.e. targeted table restore. as a database administrator, one specific table restore can help reduce the risk on a production enrolment if only a single table need to be restored is a clear action.
4. Summary
In this blog, we discussed the basic of PostgreSQL backup restore using a free open-source tool, i.e. pg_rman, and hope this piece information can help if you are looking for a free backup and restore solution for PostgreSQL.
Nowadays, supporting distributed transactions is a typical requirement for many use cases, however, the global deadlock detection is one of the key challenging issues if you plan to use PostgreSQL to setup a distributed database solution. There are many discussions about global deadlock, but this blog will provide you a step-by-step procedure about how to create such a global deadlock and share some thoughts based on personal experience.
2. Deadlock
First of all, the basic concept of a deadlock is that Process A is trying to acquire Lock2 while it is holding Lock1 and Process B is trying to acquire Lock1 while it is holding Lock2 at the same moment. In this situation, Either Process A or Process B can’t not continue and they will wait for each other forever. Since PostgreSQL allows user transactions to request locks in any order, therefore, this kind of deadlock can happen. When this kind of deadlock is happening, there is no win-win solution, the only way to solve this locking issue is that one of the transactions has to abort and release the lock.
To address this deadlock issue, PostgreSQL has two key things built-in: 1) try to avoid the deadlock by having a lock waiting queue and sort the locks requests to avoid potential deadlock; 2) requires the transaction to abort if a deadlock detected; By having these two key designs, a deadlock happens within a single PostgreSQL server can be easily resolved. For more details information about the deadlock, you can refer to the official document at src/backend/storage/lmgr/README. In this blog, we call this kind of deadlock as local deadlock compared with the one (global deadlock) we are going to discuss more below.
The reason PostgreSQL can detect this local deadlock is because PostgreSQL knows all the locks information, and it can easily find a lock waiting cycle. In the source code, PostgreSQL defines a generic LOCKTAG data struct to let user transaction fill in different lock information. Here is how the LOCKTAG data struct is defined in PostgreSQL.
1
2
3
4
5
6
7
8
9
typedef struct LOCKTAG { uint32 locktag_field1; /* a 32-bit ID field */ uint32 locktag_field2; /* a 32-bit ID field */ uint32 locktag_field3; /* a 32-bit ID field */ uint16 locktag_field4; /* a 16-bit ID field */ uint8 locktag_type; /* see enum LockTagType */ uint8 locktag_lockmethodid; /* lockmethod indicator */ } LOCKTAG;
In PostgreSQL, there are about 10 Micros defined to address different locks in different use cases, and you can find the details by searching below key info.
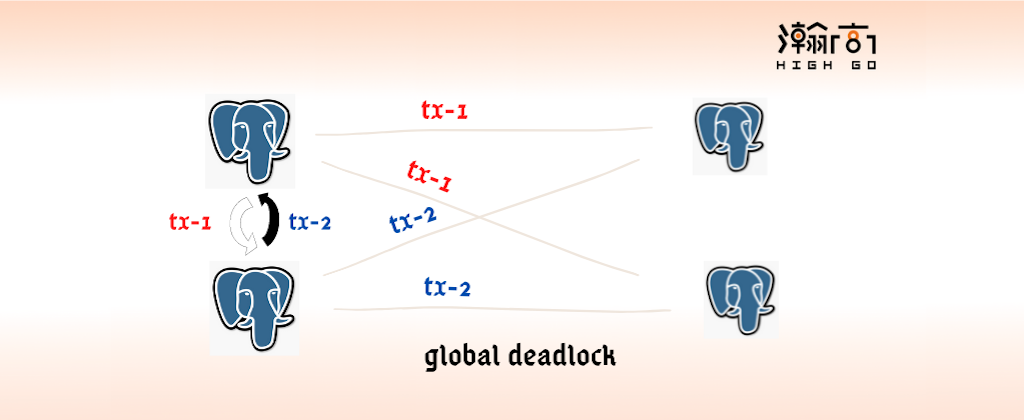
In a distributed PostgreSQL deployment environment (typically, one or more Coordinator Nodes plus multiple Data Nodes), a deadlock can happen globally, like the one described in Databases and Distributed Deadlocks: A FAQ. A deadlock triggered by Coordinator Node and caused multiple Data Nodes to wait for each other is called global deadlock or distributed deadlock. In this case, the original PostgreSQL can’t solve this problem as each Data Node doesn’t take this situation as a deadlock.
3. How to create a global deadlock
To better understand the global deadlock issue, we can create a global deadlock by following below steps. First, you need to install postgres_fdw extension to setup a simple distributed database cluster by running below commands.
3.1. Setup a simple distributed PostgreSQL database cluster
Assume you have installed PostgreSQL or built your own binaries, and then initialize four PostgreSQL servers like below,
For each PostgreSQL database, edit the configuration files to set different port and cluster name. In this case, we have two Coordinator Nodes sitting on Port 50001 and 50002, and two Data Nodes listening on 60001 and 60002.
1 2 3 4 5 6 7 8 9 10 11 12
vim /tmp/pgdata_dn1/postgresql.conf port = 60001 cluster_name = 'dn1' vim /tmp/pgdata_dn2/postgresql.conf port = 60002 cluster_name = 'dn2' vim /tmp/pgdata_cn1/postgresql.conf port = 50001 cluster_name = 'cn1' vim /tmp/pgdata_cn2/postgresql.conf port = 50002 cluster_name = 'cn2'
Coordinator Node setup is a little complicated. Here, we are using the postgres_fdw extension to create a simple distributed PostgreSQL database cluster, therefore, you need to follow below steps to setup the postgres_fdw extension, user mappings, and foreign servers and tables. Setup the extension, foreign servers, user mappings, and tables on Coordinator Node 1.
psql -d postgres -U $USER -p 50001 -c "create server s1 foreign data wrapper postgres_fdw options (dbname 'postgres', host '127.0.0.1', port '60001');" psql -d postgres -U $USER -p 50001 -c "create server s2 foreign data wrapper postgres_fdw options (dbname 'postgres', host '127.0.0.1', port '60002');"
psql -d postgres -U $USER -p 50001 -c "create user mapping for $USER server s1 options( user '$USER');" psql -d postgres -U $USER -p 50001 -c "create user mapping for $USER server s2 options( user '$USER');"
psql -d postgres -U $USER -p 50001 -c "create table t(a int, b text) partition by range(a);" psql -d postgres -U $USER -p 50001 -c "create foreign table t_s1 partition of t for values from (1000) to (1999) server s1 options(schema_name 'public', table_name 't');" psql -d postgres -U $USER -p 50001 -c "create foreign table t_s2 partition of t for values from (2000) to (2999) server s2 options(schema_name 'public', table_name 't');"
Setup the extension, foreign servers, user mappings, and tables on Coordinator Node 2.
psql -d postgres -U $USER -p 50002 -c "create server s1 foreign data wrapper postgres_fdw options (dbname 'postgres', host '127.0.0.1', port '60001');" psql -d postgres -U $USER -p 50002 -c "create server s2 foreign data wrapper postgres_fdw options (dbname 'postgres', host '127.0.0.1', port '60002');"
psql -d postgres -U $USER -p 50002 -c "create user mapping for $USER server s1 options( user '$USER');" psql -d postgres -U $USER -p 50002 -c "create user mapping for $USER server s2 options( user '$USER');"
psql -d postgres -U $USER -p 50002 -c "create table t(a int, b text) partition by range(a);" psql -d postgres -U $USER -p 50002 -c "create foreign table t_s1 partition of t for values from (1000) to (1999) server s1 options(schema_name 'public', table_name 't');" psql -d postgres -U $USER -p 50002 -c "create foreign table t_s2 partition of t for values from (2000) to (2999) server s2 options(schema_name 'public', table_name 't');"
3.4. Create a global deadlock
Now, after you have setup this simple distributed PostgreSQL database cluster, you can run below commands in two different psql sessions/consoles to create a global deadlock.
First, insert one tuple on each Data Node.
1
2
psql -d postgres -U $USER -p 50001 -c "insert into t values(1001, 'session-1');" psql -d postgres -U $USER -p 50002 -c "insert into t values(2001, 'session-2');"
Second, start two different psql consoles and run the tuple update based on below sequence indicated by (x).
1 2 3 4 5 6 7 8 9 10 11
psql -d postgres -U $USER -p 50001 begin; update t set b = 'session-11' where a = 1001; (1)
update t set b = 'session-11' where a = 2001; (4)
psql -d postgres -U $USER -p 50002 begin; update t set b = 'session-22' where a = 2001; (2)
update t set b = 'session-22' where a = 1001; (3)
After, the update query (4) has been executed, you will end up like below waiting situation,
1 2 3 4 5 6 7 8 9 10 11 12 13
postgres=# begin; BEGIN postgres=*# update t set b = 'session-11' where a = 1001; UPDATE 1 postgres=*# update t set b = 'session-11' where a = 2001;
postgres=# begin; BEGIN postgres=*# update t set b = 'session-22' where a = 2001; UPDATE 1 postgres=*# postgres=*# update t set b = 'session-22' where a = 1001;
If you grep postgres process using below command, and you will find two separate postgres from two different Data Node are in UPDATE waiting, and this will last forever.
1
2
3
david:postgres$ ps -ef |grep postgres |grep waiting david 2811 2768 0 11:15 ? 00:00:00 postgres: dn1: david postgres 127.0.0.1(45454) UPDATE waiting david 2812 2740 0 11:15 ? 00:00:00 postgres: dn2: david postgres 127.0.0.1(55040) UPDATE waiting
When the global deadlock is happening above, you can check the waiting process in details by gdb attaching to any of them. If you dig into the source code, you can find out that this global deadlock is actually related with SET_LOCKTAG_TRANSACTION.
Another approach is that instead of avoid the problems, or using wait-for-graph to find a cycle, we can also consider to have an independent program or even a simple database to help check if there is a global deadlock. Sometimes, the issue is hard to solve is because it is hard to get all the information. The reason we can easily see a deadlock caused by one or multiple Coordinator Nodes is because we take one step back and look at the situation as a whole picture.
5. Summary
In this blog, we discussed the basic global deadlock issue, setup a simple distributed database cluster using postgres_fdw and demonstrated a global deadlock. We also discussed different approaches to either avoid this global deadlock or solve it in different ways.
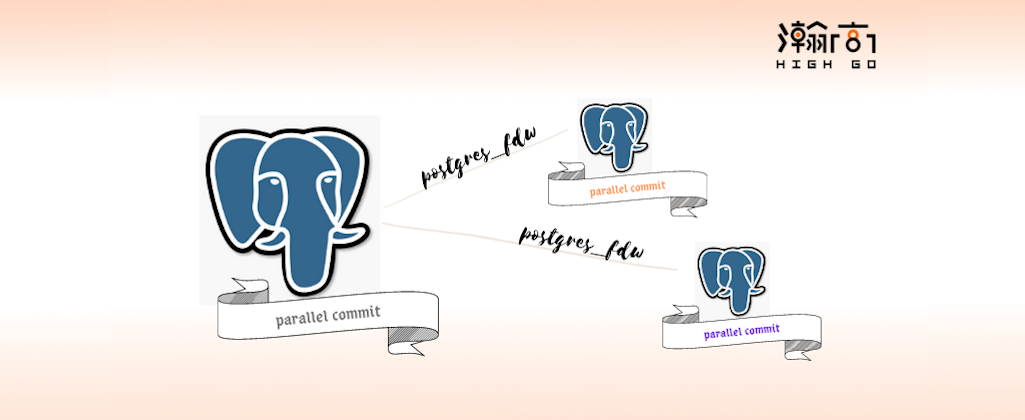
PostgreSQL is one of the greatest open source databases, not only because of the extensibility and SQL compliance but also the evolution of new features. For example, in postgres_fdw, there is a new feature parallel commit has been added into the main branch and will be released in PG15. This blog is for a quick taste of this new feature.
2. how parallel commit works
If you are a PostgreSQL database developer or if your internal database is built based on PostgreSQL database, and especially you have some applications which are related with the extension postgres_fdw, then you might wnat to take a look at this parallel commit feature. This new feature is committed just a month ago. It may help you on solving some performance issues, or as a reference if you are planning to build any parallel features on a postgres_fdw based solution. Here is the details about this parallel commit for postgres_fdw.
postgres_fdw: Add support for parallel commit. postgres_fdw commits remote (sub)transactions opened on remote server(s) in a local (sub)transaction one by one when the local (sub)transaction commits. This patch allows it to commit the remote (sub)transactions in parallel to improve performance. This is enabled by the server option "parallel_commit". The default is false.
By default, this parallel commit feature is turned off. If you want to try it you can simply turn it on by
1
ALTER SERVER loopback OPTIONS (ADD parallel_commit 'true');
Once this parallel commit option is on for those foreign servers involved in a local transaction and when this local transaction commits, the opened remote transaction on those foreign servers will be committed in parallel. By providing this option, PostgreSQL community expects some performance improvement when multiple foreign servers involved in a transaction. This parallel commit feature can be useful for some applications on distributed PostgreSQL database clusters using postgre_fdw.
To verify the performance improvement, you can simply test it for before and after using below commands,
1 2 3 4 5 6 7 8 9
psql -d postgres -p 5432 -Atq <<EOT \timing on BEGIN; SAVEPOINT s; INSERT INTO ft1 VALUES (10, 10); INSERT INTO ft2 VALUES (20, 20); RELEASE SAVEPOINT s; COMMIT; EOT
According to the initial discussion for this parallel commit feature, below are some performance numbers for your reference.
1 2 3 4 5 6 7
* RELEASE
  parallel_commit=0: 0.385 ms
  parallel_commit=1: 0.221 ms

* COMMIT
  parallel_commit=0: 1.660 ms
  parallel_commit=1: 0.861 ms
To disable this feature, you can run a command like below,
1
ALTER SERVER loopback OPTIONS (DROP parallel_commit);
3. Summary
In this blog, we discussed the parallel commit feature recently added to postgres_fdw. When you apply this feature to your production servers you might need to be careful as it is mentioned in the document, this option might increase the remote server’s load when the local (sub)transaction commits.
Recently, I was working on an internal issue related with buffer manager in PostgreSQL, and I saw a typical use of the Lightweight lock in buffer manager like below.
Basically, when the buffer manger needs to access a buffer block using buffer tag, it will have to acquire a lightweight lock in either shared or exclusive mode, then find the buffer block and then release the lightweight lock.
Since the buffer manager is shared among multiple backends and a buffer block is accessed very often, this snippet has to be designed to protect the data consistency for read and write and no impact on performance.
This blog will explain how this snippet works in PostgreSQL and emphasize a little bit more on the lightweight lock acquire.
2. how to use snapshot public functions
Now, let’s go through the snippet above line by line. The first line simply uses a Macro to initialize a buffer tag using those five numbers. Here, INIT_BUFFERTAG is a macro defines like below,
After the macro call, the newTag has been assigned with those five numbers, i.e., table space number, database number, relation number, fork number (data, fsm or visibility map etc), and the block number (each block is 8k) within the actual file;
The second line newHash = BufTableHashCode(&newTag); generates a hash number based on the buffer tag. Where, The function BufTableHashCode computes the hash code associated with given buffer tag in the global shared buffer hash table, and return a unsigned integer.
The third line retrieves a partition lock within the locks pool used an unsigned integer hash number mod the total number of partition locks (default 128). Again, the function BufMappingPartitionLock is a predefined macro and is showing below.
It will return a lock in MainLWLockArray lightweight locks array. Where the BUFFER_MAPPING_LWLOCK_OFFSET is number of dedicated lightweight locks defined in lwlocknames.txt file. The number of partition lightweight locks are 128 locks located after these dedicated locks defined in these main lightweight locks array. Here, the macro BufTableHashPartition is to make sure it always returns a lock in the partition locks pool for any given hash number.
The fourth line to is to acquire the lightweight lock with a very efficient algorithm. This LWLockAcquire will help return a lightweight lock in the specified mode, i.e., shared (for read only operation) or exclusive (for write operation). This function returns true if the lock was available immediately, false if it has to sleep and wait. Inside this LWLockAcquire, there are many considerations, but I want to emphasize one smart c implementation in the function LWLockAttemptLock, and I believe you can use this similar idea as a design pattern to design other CPU and Memory sensitive logic in your applications. As you can see below is the key implementation of this shared and exclusive lock.
This implementation involves three macros: LW_LOCK_MASK, LW_VAL_EXCLUSIVE and LW_VAL_SHARED, where LW_LOCK_MASK is a consistent number, i.e., 0xFFFFFF, used in bit operation. If any lower 24 bits has a one, then it means the lock is held in either shared or exclusive mode. In other words, someone is still reading the data, if you want the update the data, please wait. If the all lower 24 bits are zeros, then it will be assigned to a big number LW_VAL_EXCLUSIVE, i.e., 0x800000, which indicates the lock is used as exclusive. If you want to acquire this lock in shared mode, then as long as the lock is not held by someone in exclusive mode and it is not held more than 0x7FFFFF, then you can acquire one shared lock and the number of usages will be simple increase by one, i.e., LW_VAL_SHARED. Of course, how many shared locks can be held at the same time is limited by other parameters.
The fifth line looks up the buffer id using the given buffer tag and hash code. Once you have acquired the lock, work on the operations immediately depends on your application, but keep in mind the lightweight lock is designed to be held only in a short period.
The sixth line release the lock back to the partition lock pool. After you finished your operations either read or write, then use this LWLockRelease function to release the lock as soon as you can, so you don’t block other processes too long especially if there is a write operation need to acquire this lock in exclusive mode.
3. Summary
In this blog, we discussed a typical snippet which uses a lightweight lock in PostgreSQL, and explained one of the most efficient piece of code implemented for Lightweight lock in PostgreSQL, i.e., LWLockAcquire. I hope this can help when you want to achieve a similar result in your own design.
I recently investigated one internal issue which was related with snapshot and found there were some changes on transaction id and snapshot information functions in PostgreSQL. Here, I am trying to share what I have learned.
Before PostgreSQL 13, all transaction id and snapshot related public functions were named as txid_xxx_yyy, such as, txid_current(), which returns the current toplevel transaction ID. txid_current_if_assigned(), which is similar to txid_current() but doesn’t assign a new xid if there isn’t one. txid_current_snapshot(), which returns current snapshot in txid format with only top-transaction XIDs. txid_status(), which reports the status of a recent transaction ID.
Started from PostgreSQL 13, the naming convention of these snapshot public functions txid_xxx_yyy has been changed to something like, pg_xxx_xact_yyy correspondingly. For example, txid_current() is replaced by pg_current_xact_id(), and txid_current_if_assigned() has been renamed to pg_current_xact_id_if_assigned(), etc.
Introduce xid8-based functions to replace txid_XXX. The txid_XXX family of fmgr functions exposes 64 bit transaction IDs to users as int8. Now that we have an SQL type xid8 for FullTransactionId, define a new set of functions including pg_current_xact_id() and pg_current_snapshot() based on that. Keep the old functions around too, for now. It's a bit sneaky to use the same C functions for both, but since the binary representation is identical except for the signedness of the type, and since older functions are the ones using the wrong signedness, and since we'll presumably drop the older ones after a reasonable period of time, it seems reasonable to switch to FullTransactionId internally and share the code for both.
Introduce xid8-based functions to replace txid_XXX.
Since PostgreSQL has provided us so many public functions for end users to check the transaction id and snapshot information in details, sometimes, we need to know how to use these funtions in a simple query to have better understanding of the ongoing transactions, visibilities, and snapshots. Here, I have some simple examples to share.
first, let’s create a simple table like below, postgres=# create table tbl01 (a int, b text); CREATE TABLE
to find out the current transaction id, you can simply do select pg_current_xact_id(); in a psql console, postgres=# select pg_current_xact_id(); pg_current_xact_id
734
(1 row) Here, the number 734 is the current transaction id. Each time, when you run such a query, the transaction id will increase by one.
If you want to know the current transaction id, then use function pg_current_xact_id_if_assigned(). Obversely, as the document indicated, if you are not within a transaction, this function won’t return any transaction id. postgres=# select pg_current_xact_id_if_assigned(); pg_current_xact_id_if_assigned
(1 row)
However, if start a transaction with begin, followed a simple insert query like below, and then run the function pg_current_xact_id_if_assigned() again, you should be able to find out your current transaction id. postgres=# begin ; BEGIN postgres=# insert into tbl01 values(1,’hello world’); INSERT 0 1 postgres=# select pg_current_xact_id_if_assigned(); pg_current_xact_id_if_assigned
736
(1 row)
The function pg_current_snapshot() will return current top level snapshot in a format like, xmin:xmax:xid1,xid2. For example, postgres=*# select pg_current_snapshot(); pg_current_snapshot
736:736: (1 row In this case, the PostgreSQL server has only one ongoing transaction which is 736.
One of the use cases for end user is that a user may want to check the tuples visibilities using pg_current_snapshot and pg_current_xact_id_if_assigned. For example, start two psql consoles with begin and followed by one simple insert operation, then check the current transaction id and current snapshots.
736:739:737 (1 row) In the first console, it tells that the current transactions id is 736, and there is another ongoing transaction 737 and any tuples update made by transaction 737 is not visibile to this console yet.
If you check the assigned transaction id and current snapshot in the second console, it will tell you a similar information. With these two public fucntions and plus an extension pageinspect, it can help debug the tuple visibilities issue.
3. Summary
In this blog, we discussed the changes made for those transaction id and snapshot public functions, and shared a few simple queries about how to use these snapshots related public funtions. It might be useful if you want to have a better understanding of the ongoing transactions and snapshots.
I have been working on an internal project based on PostgreSQL for a while, and from time to time, I need to run some specific test cases to verify my changes. Here, I want to shared a tip to run a specific regression TAP test quickly, especially, when you are focusing on a particular bug and you know which test case can help verify the fix. A details document about the regression test can be found at Running the Tests.
2. Regression test
PostgreSQL provides a comprehensive set of regression tests to verify the SQL implementation embedded in PostgreSQL as well as the extended capabilities of PostgreSQL. Whenever you make some changes, you should run these existing test cases to make sure your change doesn’t break any existing features. Other than these regression tests, there are some special features using a test framework call TAP test. For example, kerberos, ssl, recovery etc.
If you want to run these tests, you have to make sure the option --enable-tap-tests has been configured. for example, ./configure --prefix=$HOME/pgapp --enable-tap-tests --enable-debug CFLAGS="-g3 -O0 -fno-omit-frame-pointer"
You can run the TAP test using either make check or make installcheck, but compared with those non-TAP tests, the different is that these TAP tests will always start a test server even you run make installcheck. Because of this different, some tests may take a longer time than you expected, and even worse, if some test cases failed in the middle then the entire test will stop, and your test cases may never get the chance to run. For example, I changed somethings related to the recovery features, and those changes suppose to be tested by test cases 021_row_visibility.pl and 025_stuck_on_old_timeline.pl, but whenever I run make check or make installcheck, it ends up with something like below.
t/001_stream_rep.pl .................. ok
t/002_archiving.pl ................... ok
t/003_recovery_targets.pl ............ ok
t/004_timeline_switch.pl ............. ok
t/005_replay_delay.pl ................ ok
t/006_logical_decoding.pl ............ ok
t/007_sync_rep.pl .................... ok
t/008_fsm_truncation.pl .............. ok
t/009_twophase.pl .................... ok
t/010_logical_decoding_timelines.pl .. ok
t/011_crash_recovery.pl .............. ok
t/012_subtransactions.pl ............. ok
t/013_crash_restart.pl ............... ok
t/014_unlogged_reinit.pl ............. ok
t/015_promotion_pages.pl ............. ok
t/016_min_consistency.pl ............. ok
t/017_shm.pl ......................... ok
t/018_wal_optimize.pl ................ ok
t/019_replslot_limit.pl .............. 11/20 Bailout called.  Further testing stopped:  pg_ctl start failed
FAILED--Further testing stopped: pg_ctl start failed
Makefile:23: recipe for target 'check' failed
make: *** [check] Error 255
Now, 019_replslot_limit.pl always failed in the middle, but those test cases to verify my changes haven’t got the chance to run yet.
3. How to run a specific test?
To run a specific test cases, the key is to use a variable PROVE_TESTS provided by PostgreSQL. Details can be found at TAP Tests. This PROVE_TESTS variable allow to define a whitespace separated list of paths to run the specified subset of tests instead of the default t/*.pl. For example: in above case, you can run make check PROVE_TESTS='t/021_row_visibility.pl t/025_stuck_on_old_timeline.pl'. It will run these two test cases directly. The output is something like below.
recovery$ make check PROVE_TESTS='t/021_row_visibility.pl t/025_stuck_on_old_timeline.pl'
make -C ../../../src/backend generated-headers
make[1]: Entering directory '/home/sandbox/sharedsm/src/backend'
make -C catalog distprep generated-header-symlinks
make[2]: Entering directory '/home/sandbox/sharedsm/src/backend/catalog'
make[2]: Nothing to be done for 'distprep'.
make[2]: Nothing to be done for 'generated-header-symlinks'.
make[2]: Leaving directory '/home/sandbox/sharedsm/src/backend/catalog'
make -C utils distprep generated-header-symlinks
make[2]: Entering directory '/home/sandbox/sharedsm/src/backend/utils'
make[2]: Nothing to be done for 'distprep'.
make[2]: Nothing to be done for 'generated-header-symlinks'.
make[2]: Leaving directory '/home/sandbox/sharedsm/src/backend/utils'
make[1]: Leaving directory '/home/sandbox/sharedsm/src/backend'
rm -rf '/home/sandbox/sharedsm'/tmp_install
/bin/mkdir -p '/home/sandbox/sharedsm'/tmp_install/log
make -C '../../..' DESTDIR='/home/sandbox/sharedsm'/tmp_install install >'/home/sandbox/sharedsm'/tmp_install/log/install.log 2>&1
make -j1  checkprep >>'/home/sandbox/sharedsm'/tmp_install/log/install.log 2>&1
rm -rf '/home/sandbox/sharedsm/src/test/recovery'/tmp_check
/bin/mkdir -p '/home/sandbox/sharedsm/src/test/recovery'/tmp_check
cd . && TESTDIR='/home/sandbox/sharedsm/src/test/recovery' PATH="/home/sandbox/sharedsm/tmp_install/home/sandbox/pgapp/bin:$PATH" LD_LIBRARY_PATH="/home/sandbox/sharedsm/tmp_install/home/sandbox/pgapp/lib:$LD_LIBRARY_PATH"  PGPORT='65432' PG_REGRESS='/home/sandbox/sharedsm/src/test/recovery/../../../src/test/regress/pg_regress' /usr/bin/prove -I ../../../src/test/perl/ -I .  t/021_row_visibility.pl t/025_stuck_on_old_timeline.pl
t/021_row_visibility.pl ......... ok
t/025_stuck_on_old_timeline.pl .. ok
All tests successful.
Files=2, Tests=11, 13 wallclock secs ( 0.01 usr  0.00 sys +  1.73 cusr  4.03 csys =  5.77 CPU)
Result: PASS
Of course, if you know the makefile very well, you can also do it on your own way. For example, by looking at the output, you can simply do in below steps to achieve the same results.
In this blog, I explained how to run a specific test case by using variable PROVE_TESTS for TAP test. You can also run the test manually to skip some tests either take too much time or may failed in the middle and block your test cases.