1. Overview
PostgreSQL is an open-source RDMS and running across many platforms including Linux (all recent distributions), Windows, FreeBSD, OpenBSD, NetBSD, Mac OS X, AIX, HP/UX, IRIX, Solaris, Tru64 Unix, and UnixWare. There are many discussions about how to build Postgres and extensions from source code on a Linux-like environment, but sometimes, a developer may want to quickly setup a Windows environment to check a feature for cross-platform support. This blog is going to explain how to build Postgres and extensions from source code on Windows platforms and it was tested on Windows 7, 10 and 2019 Server.
2. Environment setup
This blog refers to the official document and the blog Compiling PostgreSQL extensions with Visual Studio on Windows, but providing many detailed screenshots on the latest version Visual Studio 2019 for building an extension as a standlone VS2019 project.
3. Install VS2019, Windows SDK and other tools
Download the latest Visual Studio 2019 package. During the installation process, selecting the option Desktop development with C++ is enough to build Postgres. This option will install MSVC for VS 2019, Windows 10 SDK and some basic C/C++ building tools. As described in the official document, ActiveState Perl is required to run the build and generate scripts, and ActiveState TCL is required for building PL/Tcl. If the you build from a released source code tar file, then install above tools should be enough for the default configuration, however if you build with the source coded cloned from github, then you need to install Bison and Flex, which can be found here.
If you prefer to use Linux style commands as much as possible, then you can install git bash. After all the tools has been installed, you need to edit the system environment variables to include all the binaries paths, for example, 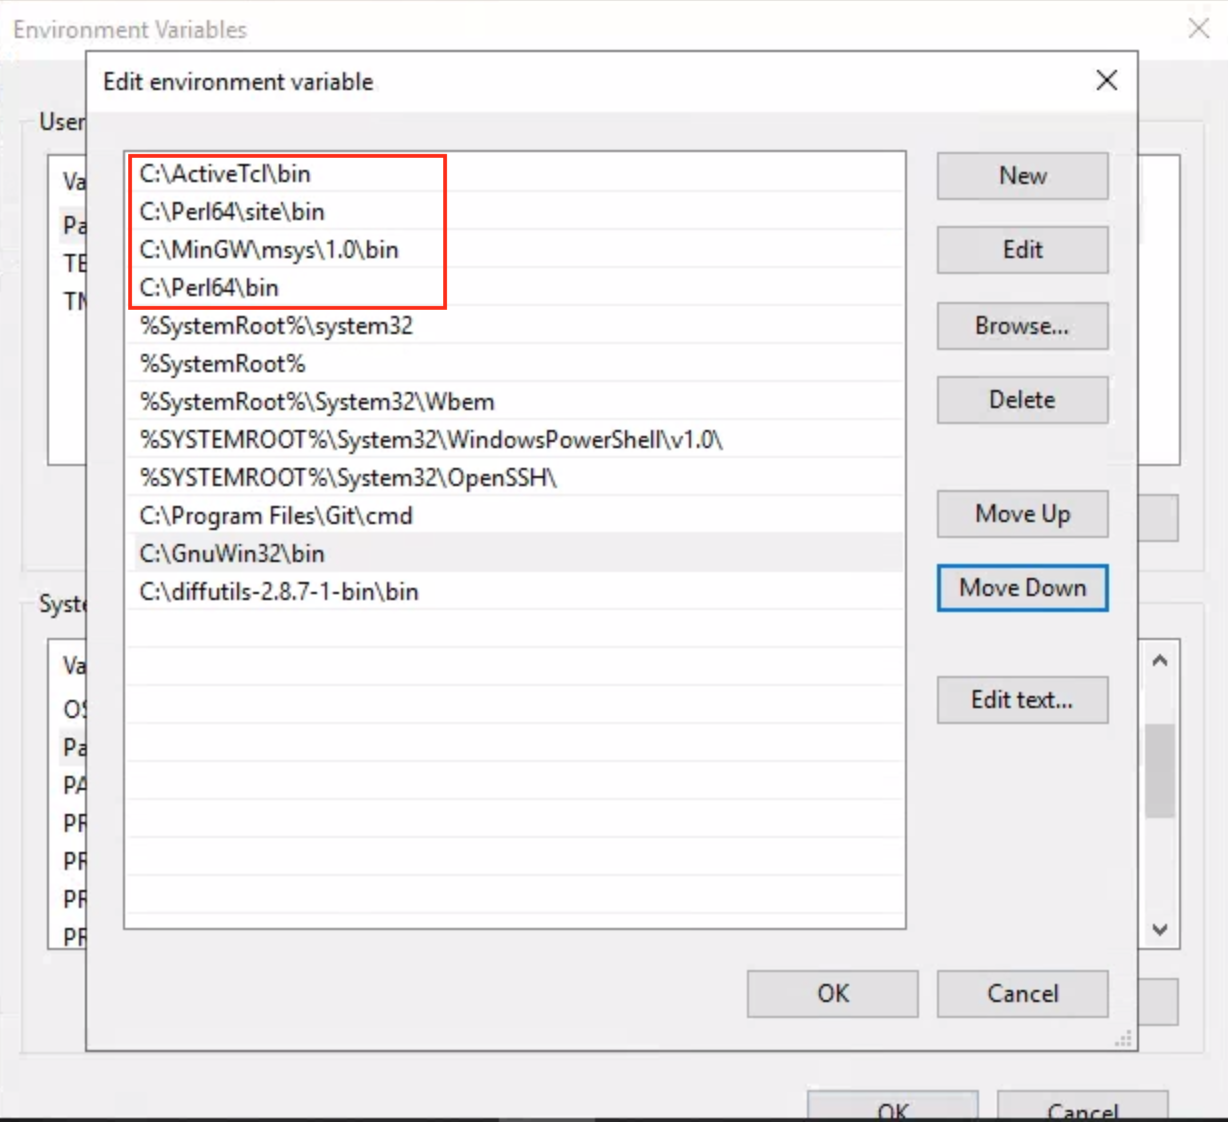
4. Build postgres
If you have an extension need to be built under the source code tree, then it is time to clone or copy your extension to contrib folder before starting the build. To build Postgres is pretty simple, just turn on VS 2019 terminal i.e. Developer Command Prompt for VS 2019 and then navigate to the windows build folder inside the postgres source code, for example, c:\Users\Administrator\Downloads\postgres\src\tools\msvc> and then run build.bat.
5. Regress test
If the build is succeeded, then you can perform a regress test by running vcregress check. To perform a regress test for the extensions, run the command vcregress contribcheck. If you are developing an extension on Windows and you want to speed up the build, then you can build your extension only by running the build script with the extension name, for example, build.bat wal2mongo. However, you can’t run a regress test for each individual extension. This can be worked around by removing all other extension from contrib folder temporally.
6. Build extension in an independent project using VS 2019
Sometimes a developer may want to build an extension within VS2019 IDE. This is a little bit tricky and not even recommended to do it in this way but it is possible. The blog mentioned above has a detailed discussion about this topic. Here, we provide a step by step guide to walk you through the whole process on VS 2019.
- Start VS 2019 and
Create a new project - Select
Empty Projecttemplate, which will create a C/C++ for Windows without any starting files. - Give a name for this extension project, for example
wal2mongo(We use wal2mongo to demonstrate how to build an extension using VS 2019) - Right click on the project, select
AddthenNew Item... - Select
C++ File (.cpp)template and name the file aswal2mongo.c - Copy the whole content from this file to the newly created
wal2mongo.cfile - Add
PGDLLEXPORTafter the keywordextern, otherwise MSVC will not export its symbol.
the original file,
and how it looks like after the changes.
- Right click the project, select
Propertiesand then change following in order,
1 Click onConfiguration Properities->General-> Configuration Type, then selectDynamic Library (.dll)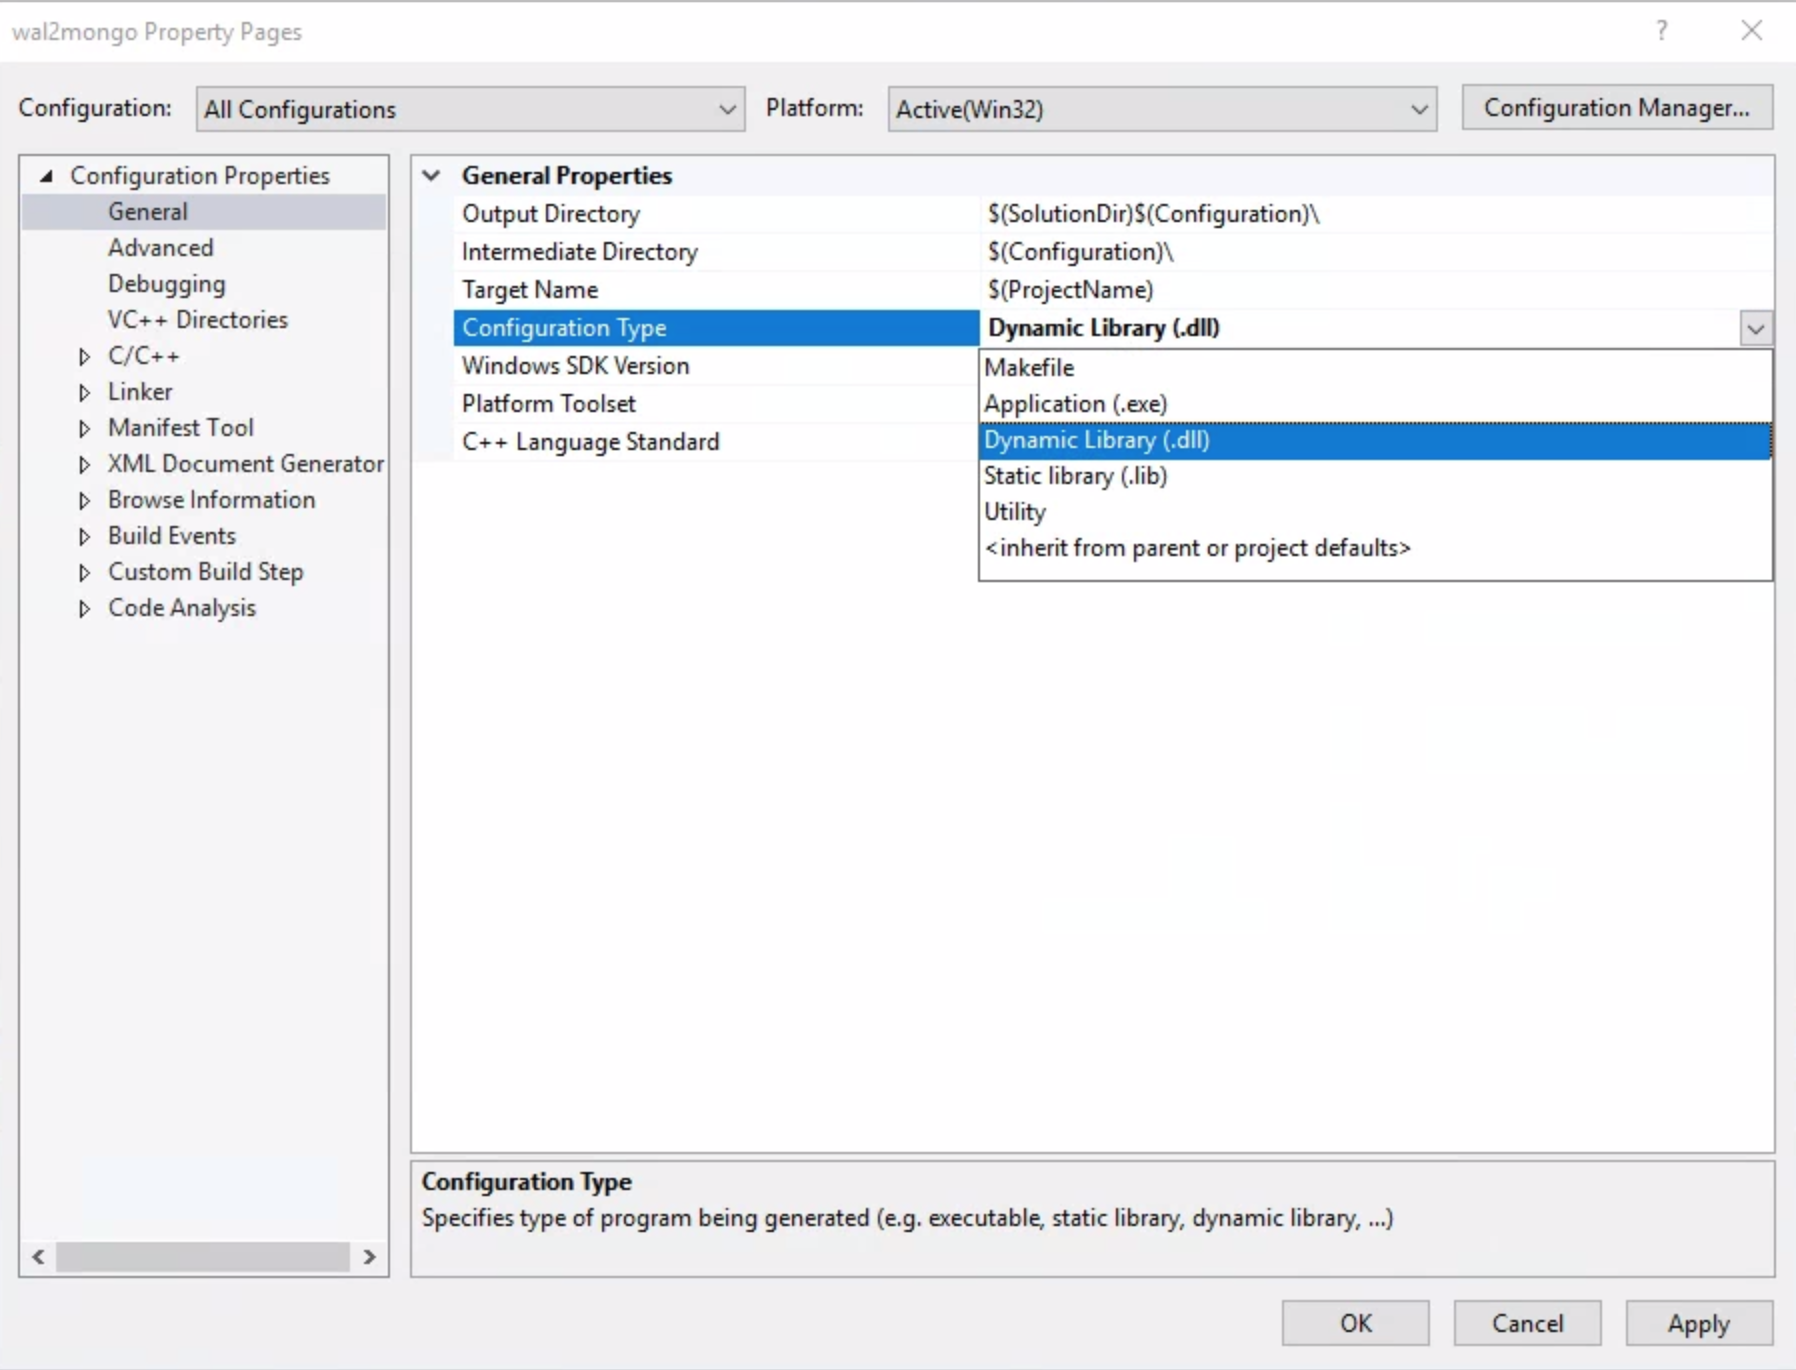
2 Click onConfiguration Prosperities->C/C++->General, add the including paths in the order below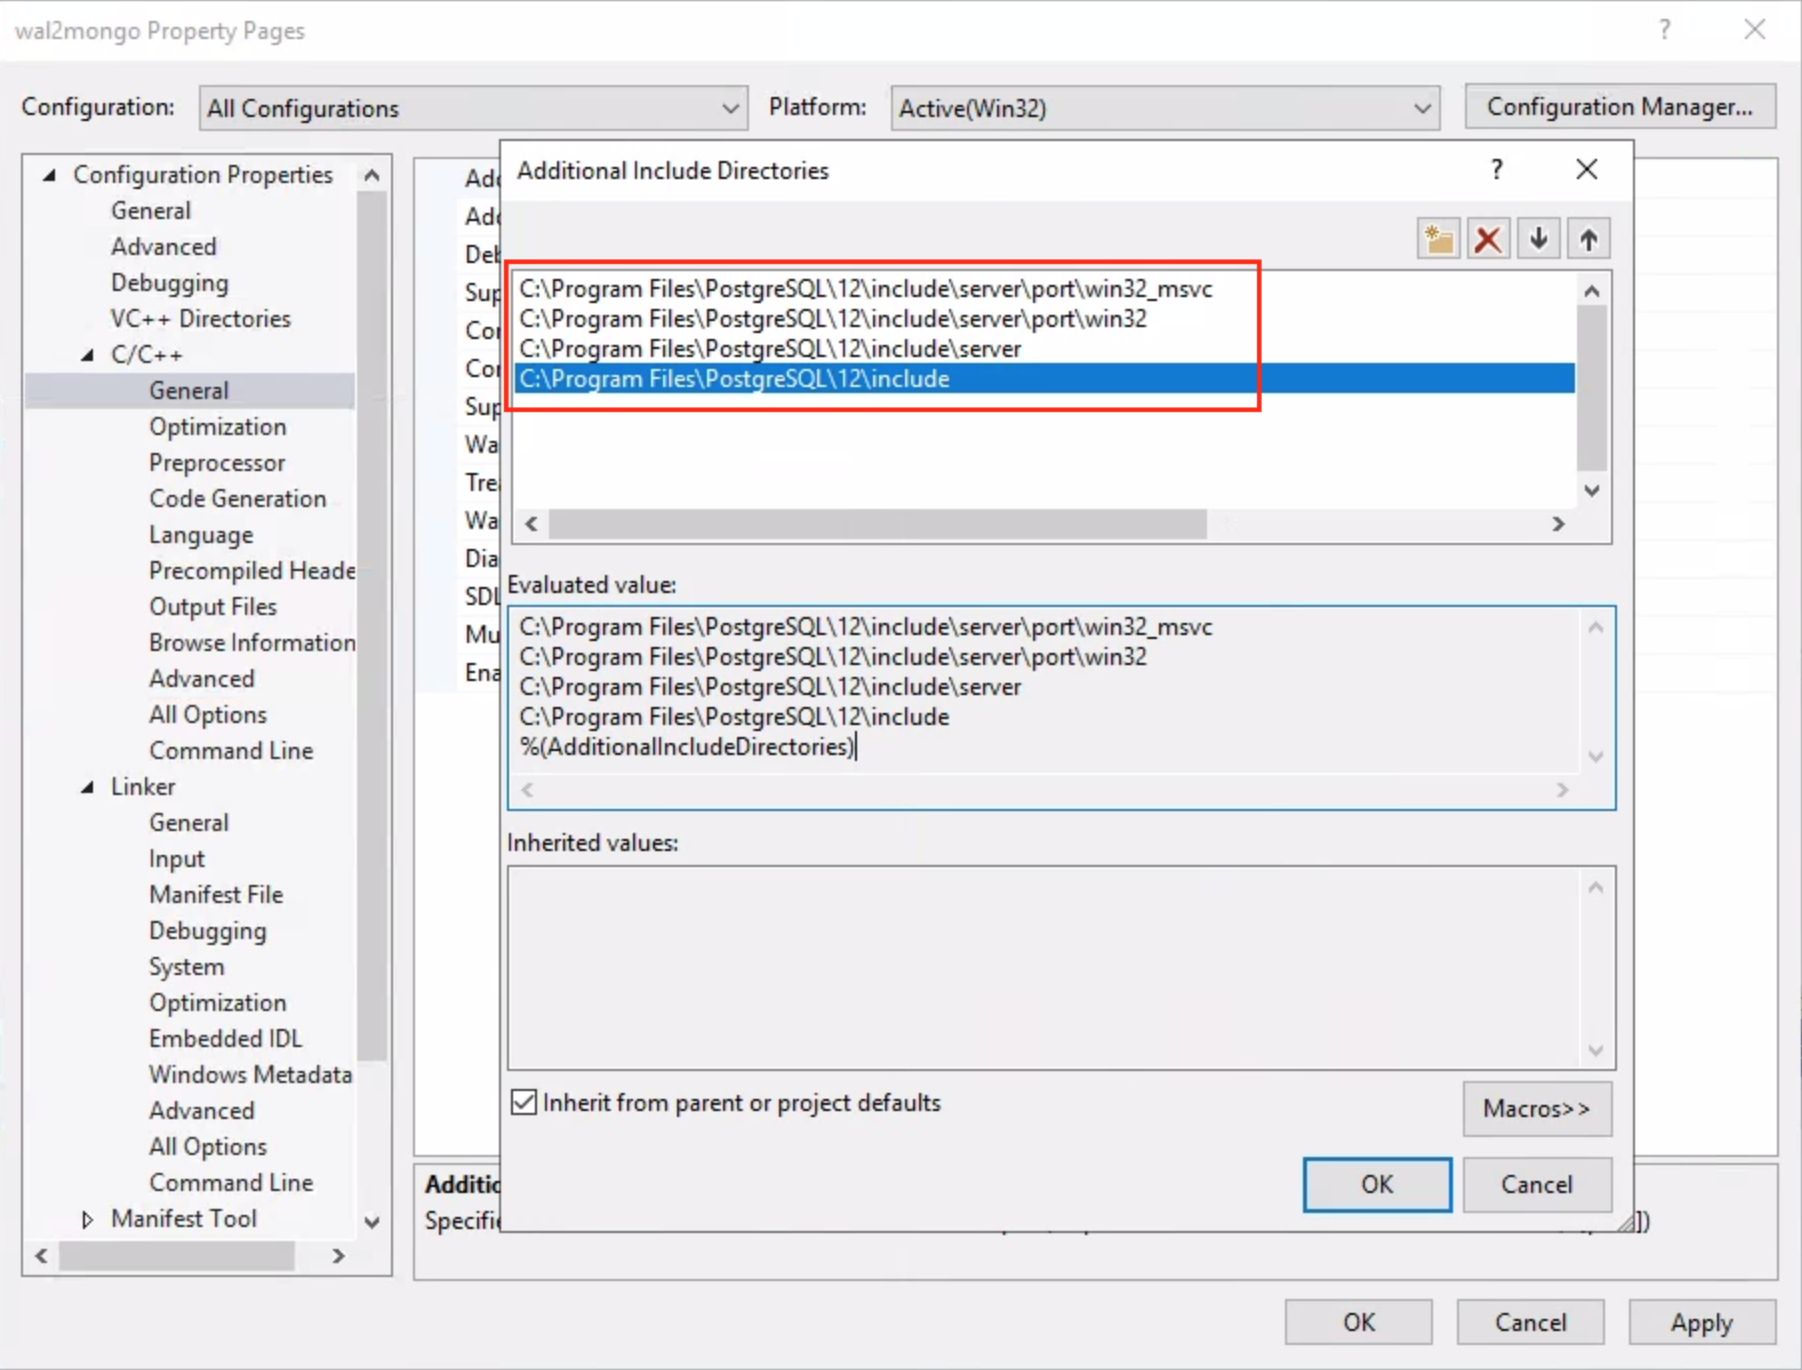
3 Click onConfiguration Prosperities->C/C++->Code Generation->Enable C++ Exceptions, selectNo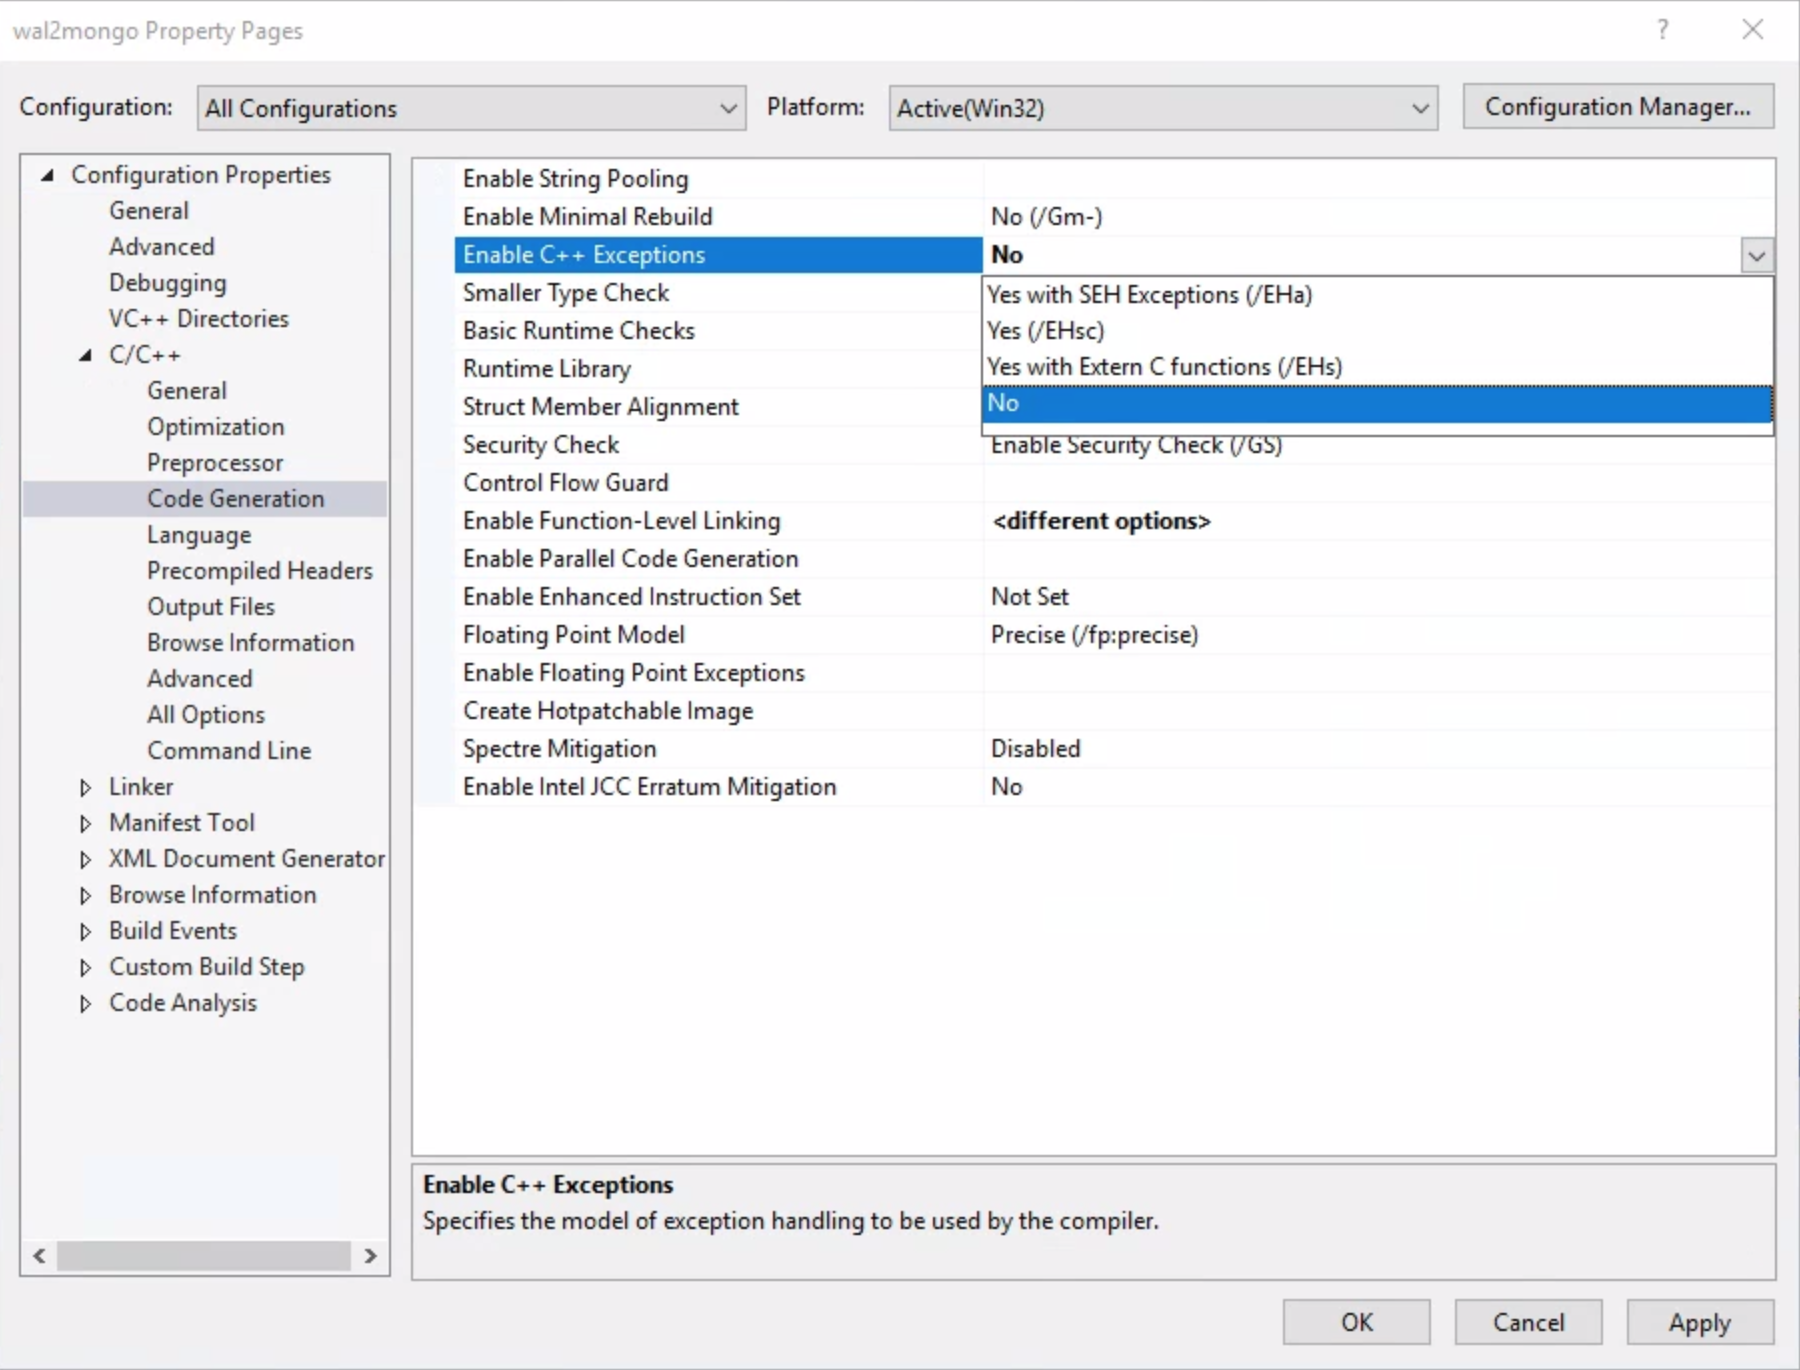
4Configuration Prosperities->C/C++->Advanced->Compile As, selectCompile as C Code(/TC)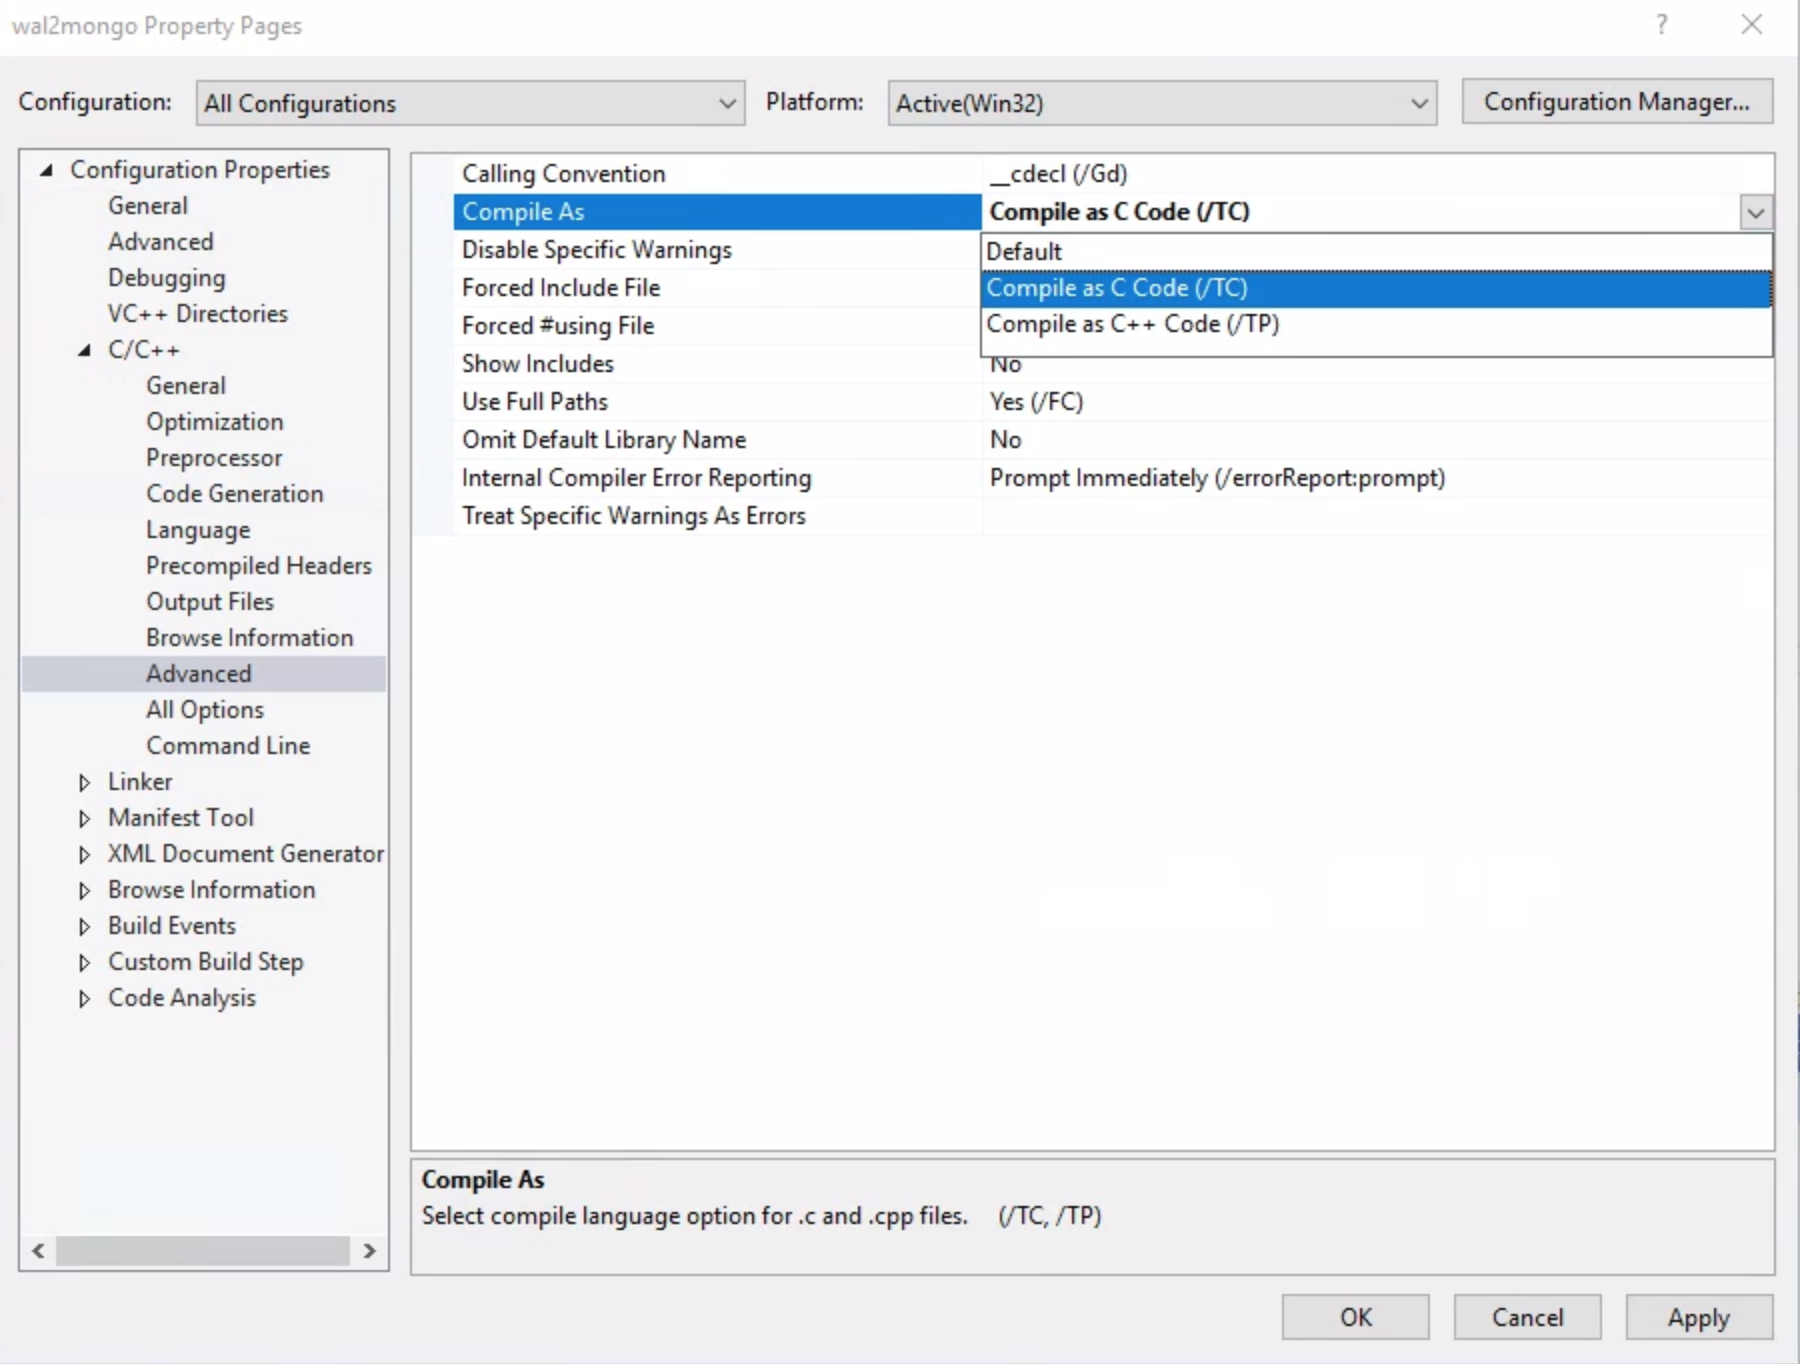
5 Click onConfiguration Prosperities->Linker->General->Additional Library Directories, enter the lib path where your Postgres libraries are installed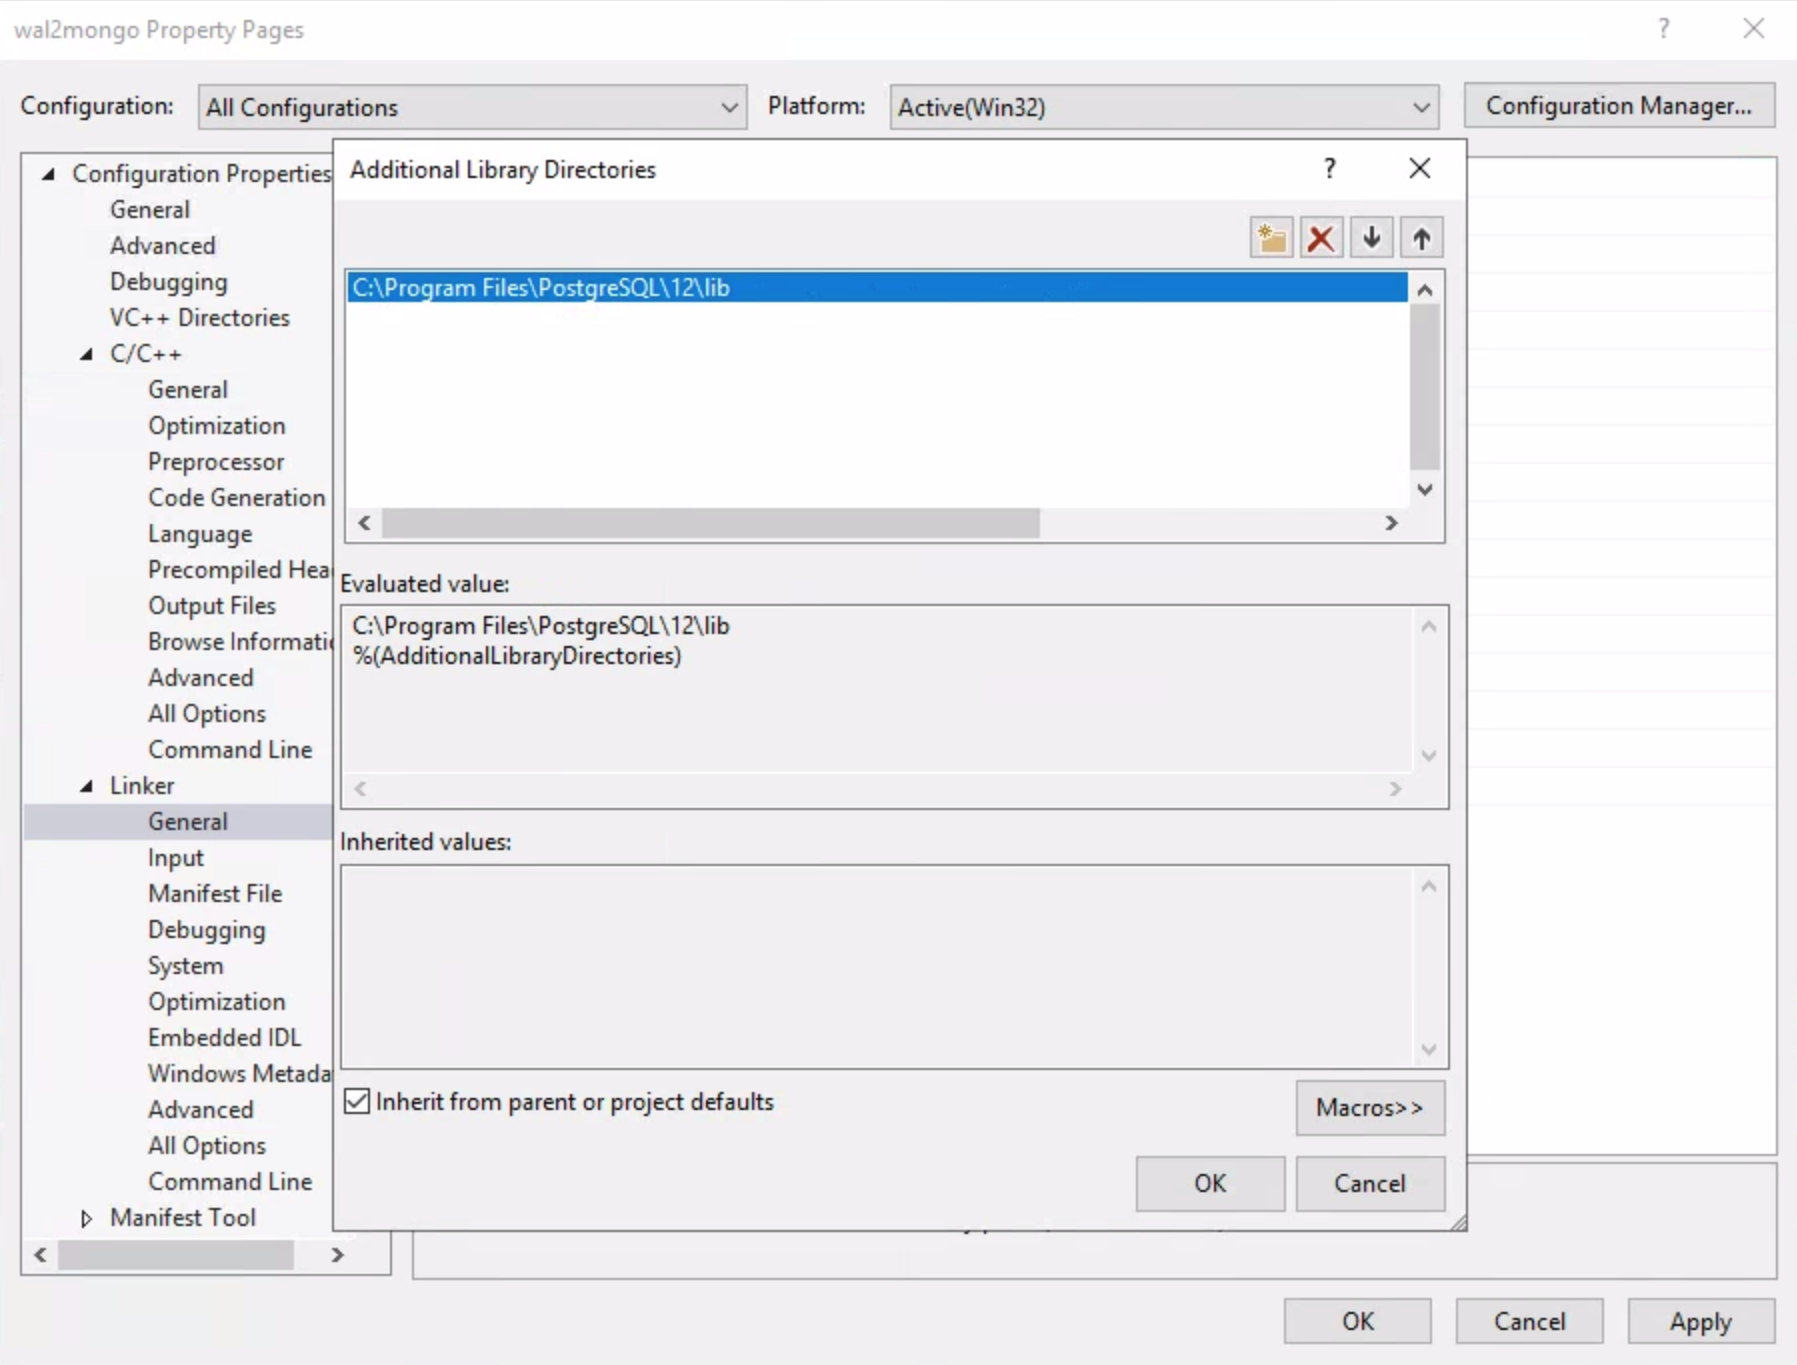
6 Click onConfiguration Prosperities->Linker->Input->Additional Dependencies, addpostgres.lib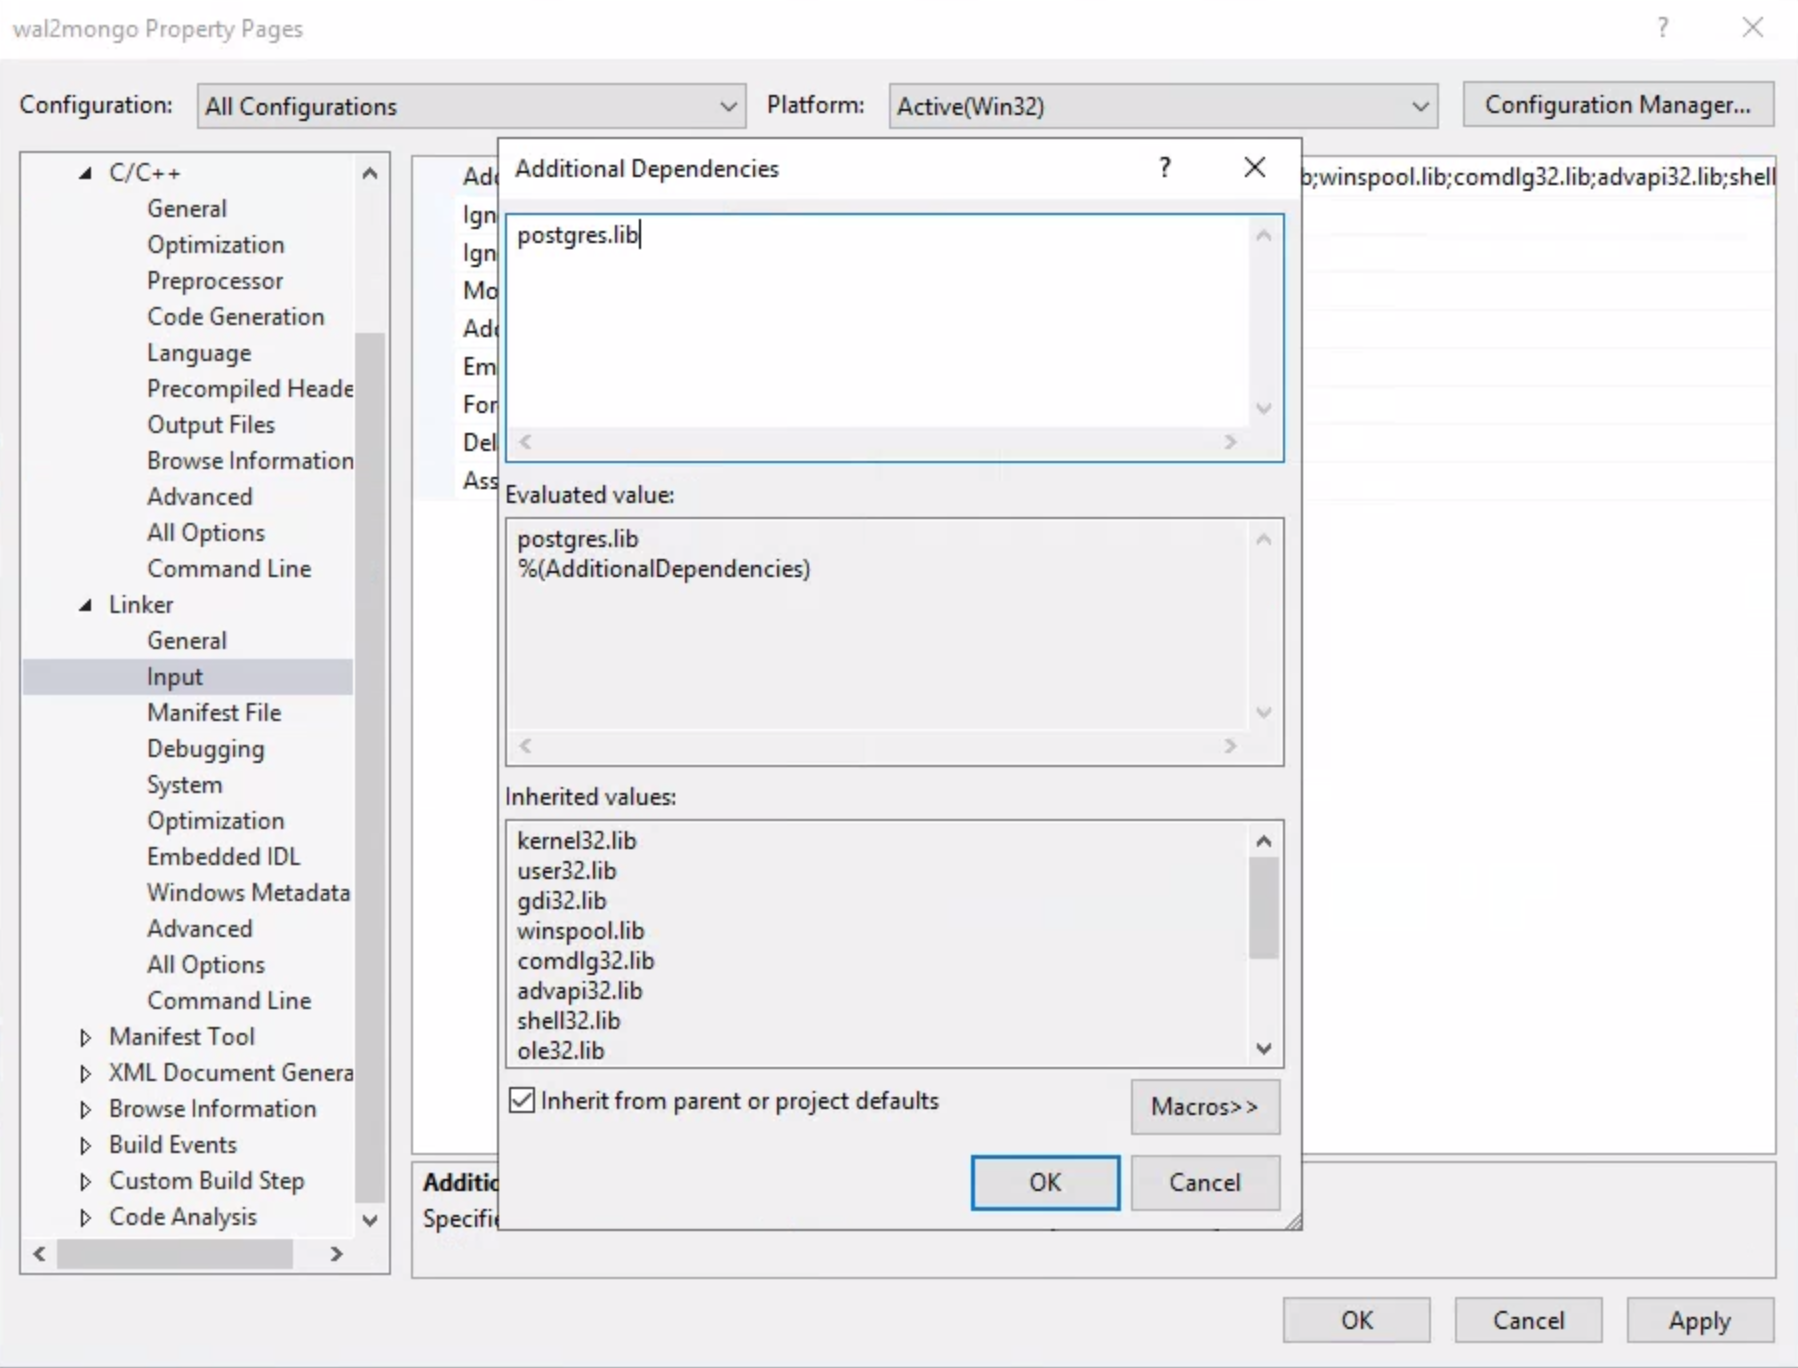
7 Click onConfiguration Prosperities->Linker->Manifest File->Generate Manifest, selectNo (/MANIFEST:NO)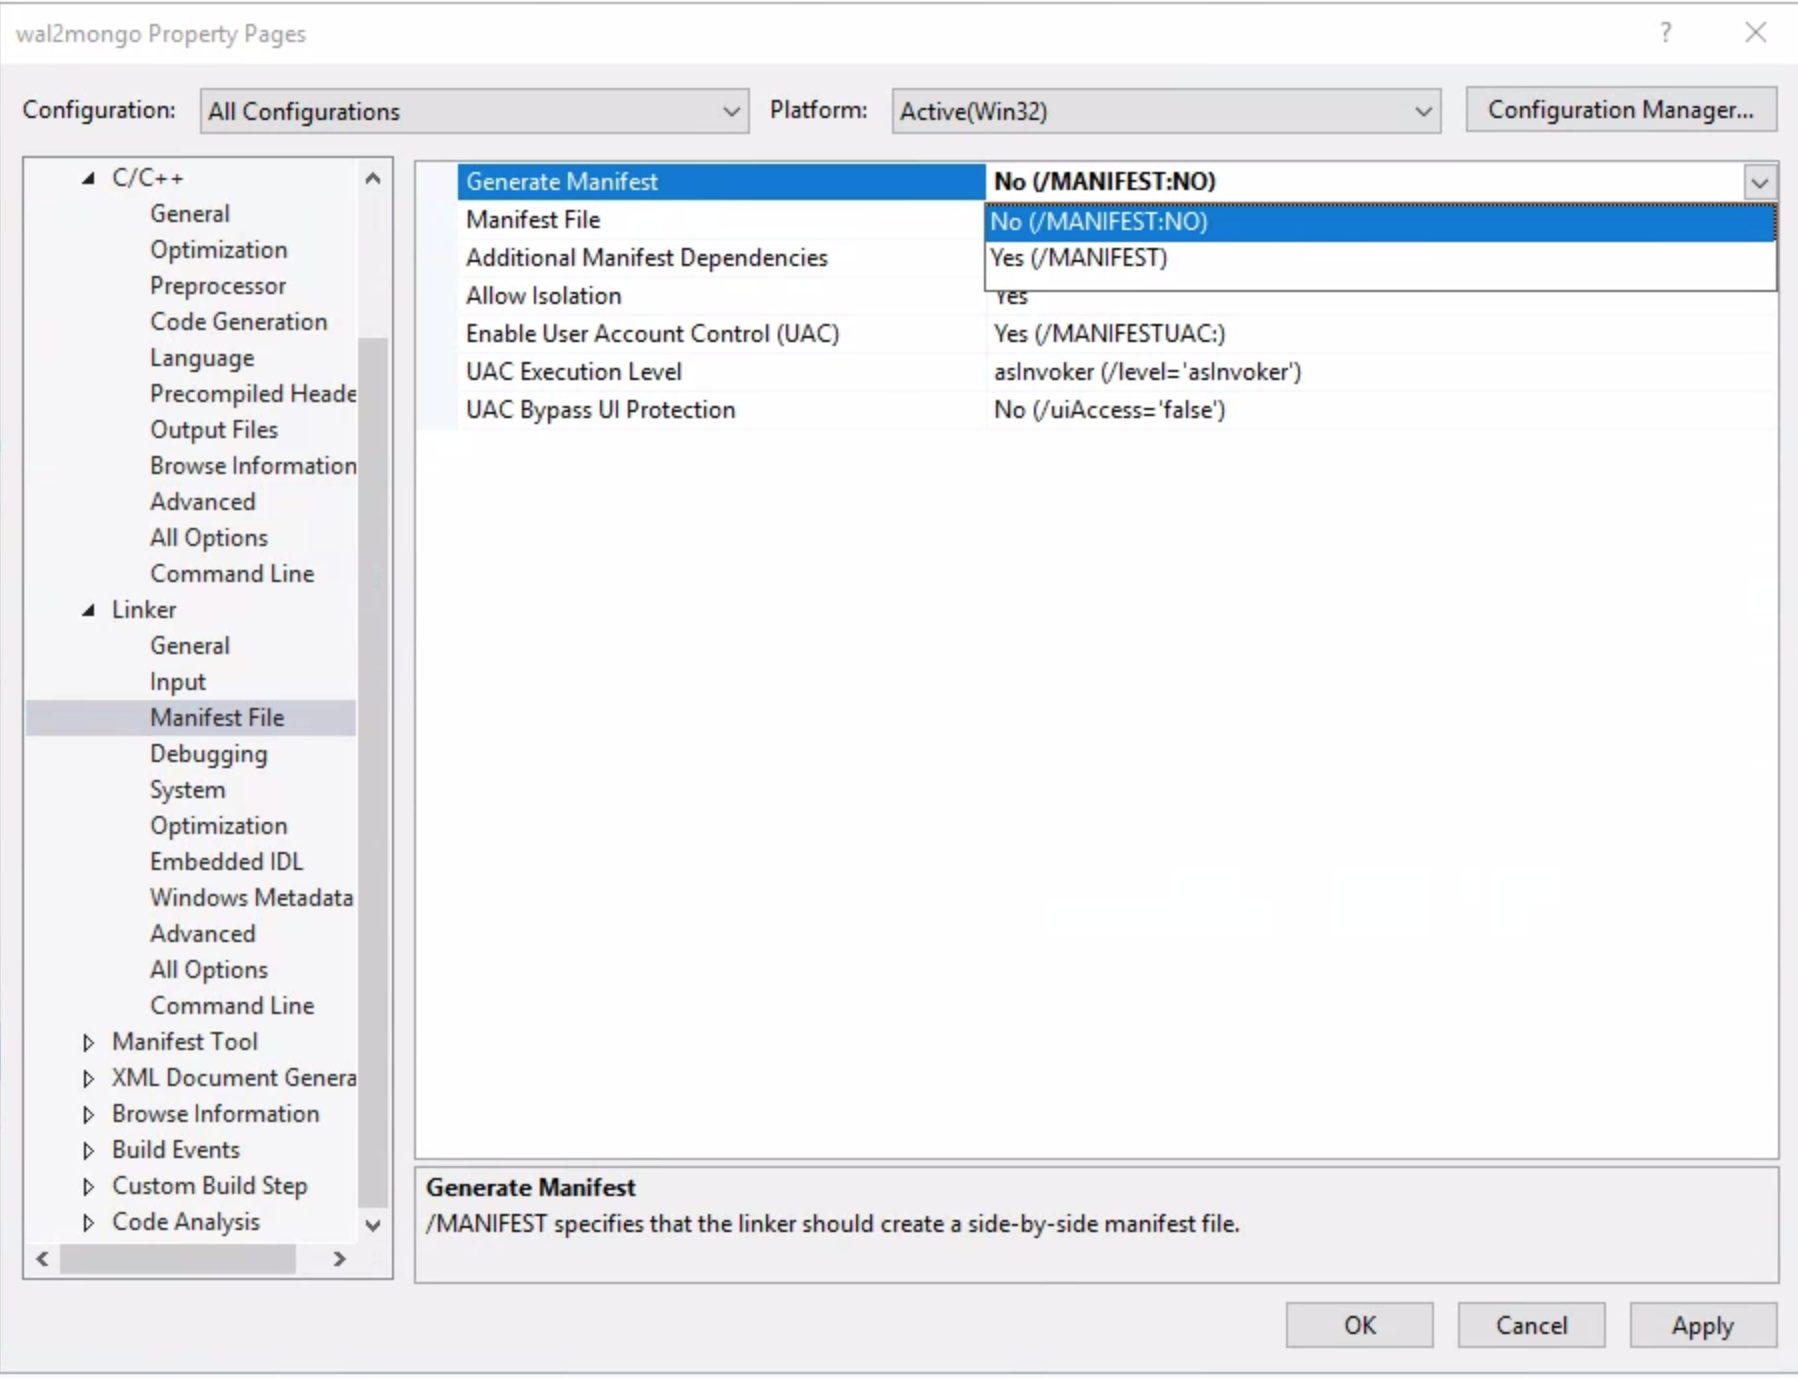
- Finally, right click on the project and then select build.
If everything goes fine, then you should seewal2mongo.dllis created. Copywal2mongo.dllto the lib folder where the Postgres libraries were installed. Then you should be able to test this extension as normal.
7. Summary
In this blog, we discussed how to build postgres and extension on Windows, especially to build an extension within VS2019.